Tripod Build Guide
🛠 Step-by-Step Build Guide
This guide walks you through assembling the Tripod Attachment, compatible with both the concrete bucket base and recommended stand.
✅ Step 1 – 3D Print all your parts
Make sure you have all these 3D printed parts before you begin:
- 3x 3D-Printed TPU Feet
- 3x 3D-Printed TPU Pipe Tieoffs
- A 3D-Printed TPU Tripod Gusset
- A 3D-Printed TPU Center Ring
- A PETG Pipe Drilling Jig (Optional, but recommended)
Be sure to 3D print each part out of the specified filament, we highly recommend you follow our print settings outlined in the Tripod Attachment 3D Prints guide.
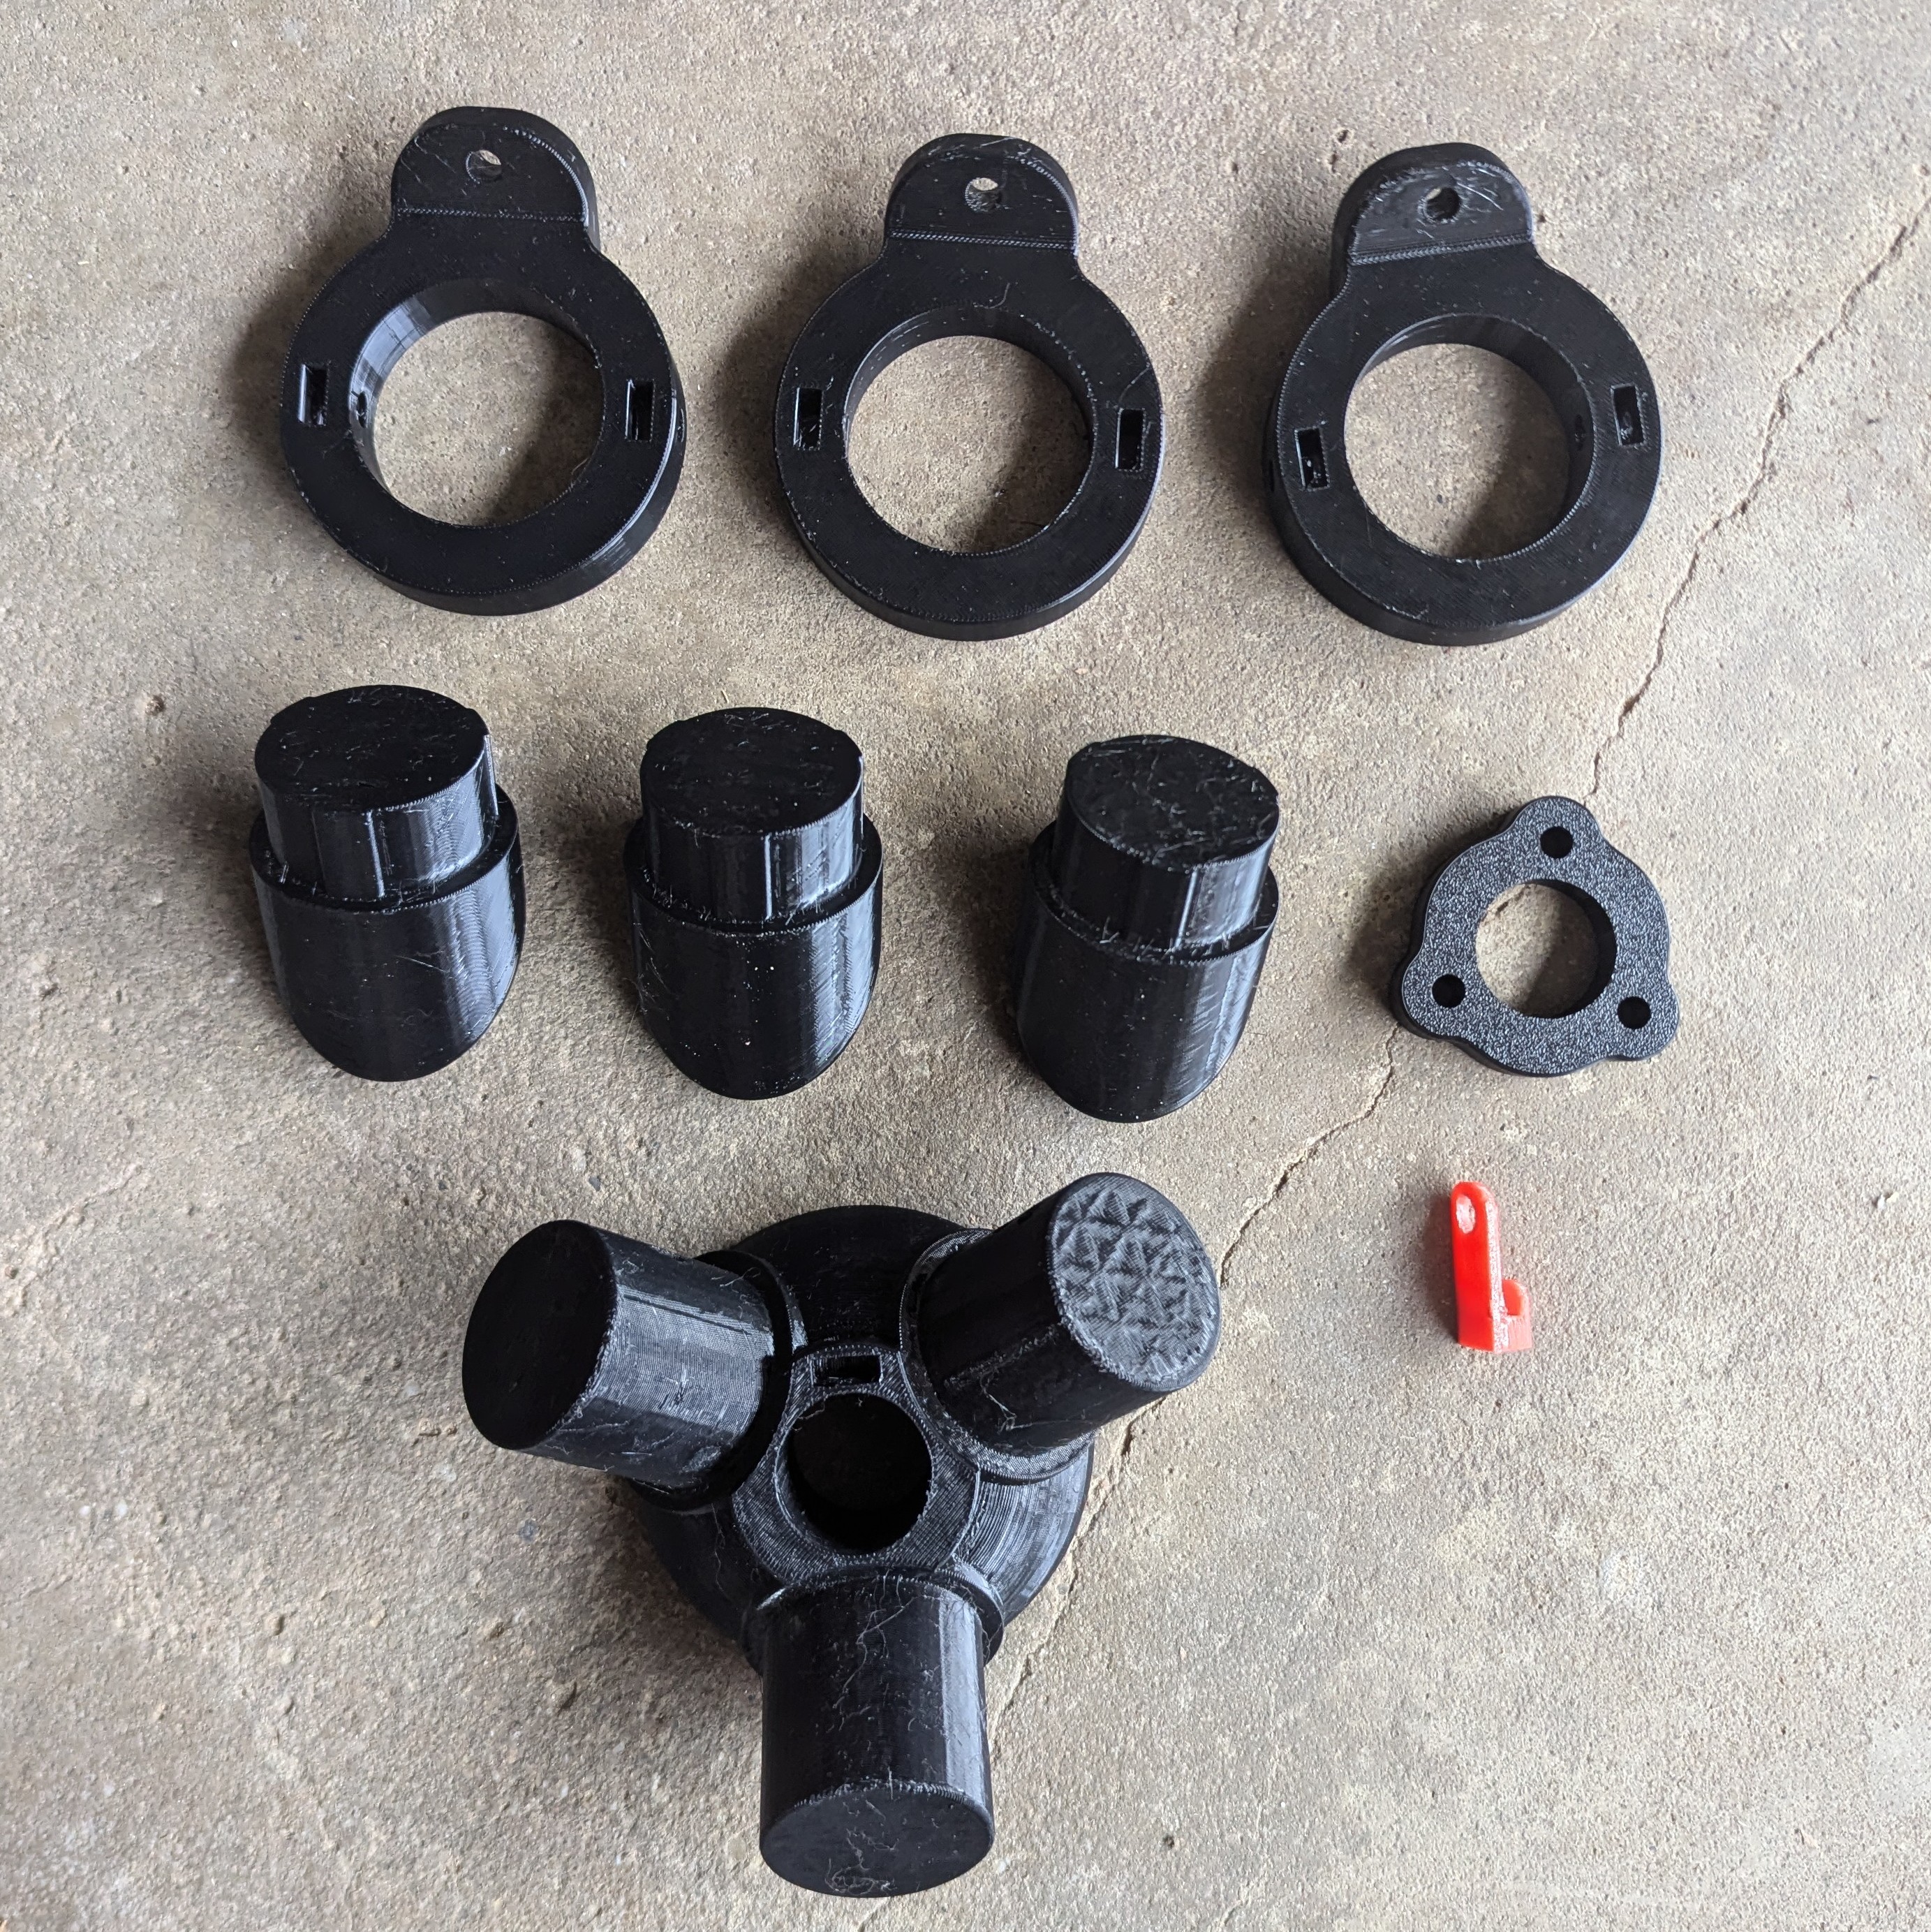
All the 3D prints needed for the Tripod Build
✅ Step 2 – Ensure you have all your hardware
Make sure you have everything before starting:
- 10ft ABS Pipe
- Nylon Paracord
- 3x 2” ¼-20 Machine Screws
- 6x 0.5” ¼-20 Machine Screws
- 1x 0.375” ¼-20 Machine Screw
- 3x ¼-20 Nuts
- 7x thin ¼-20 Nuts
You will also need the following tools:
- A benchsaw, woodsaw, or handsaw to cut the ABS pipes
- An electric drill
- A tape measure
🔨 Step 3 – Cut pipes into 3-foot (36") segments
Using your tape measure and saw, mark and cut your 10ft length of ABS pipe into three (3) sections, each of which are 3ft (36") long. Consider using a Miter Box (here is an example) to ensure a straight cut.
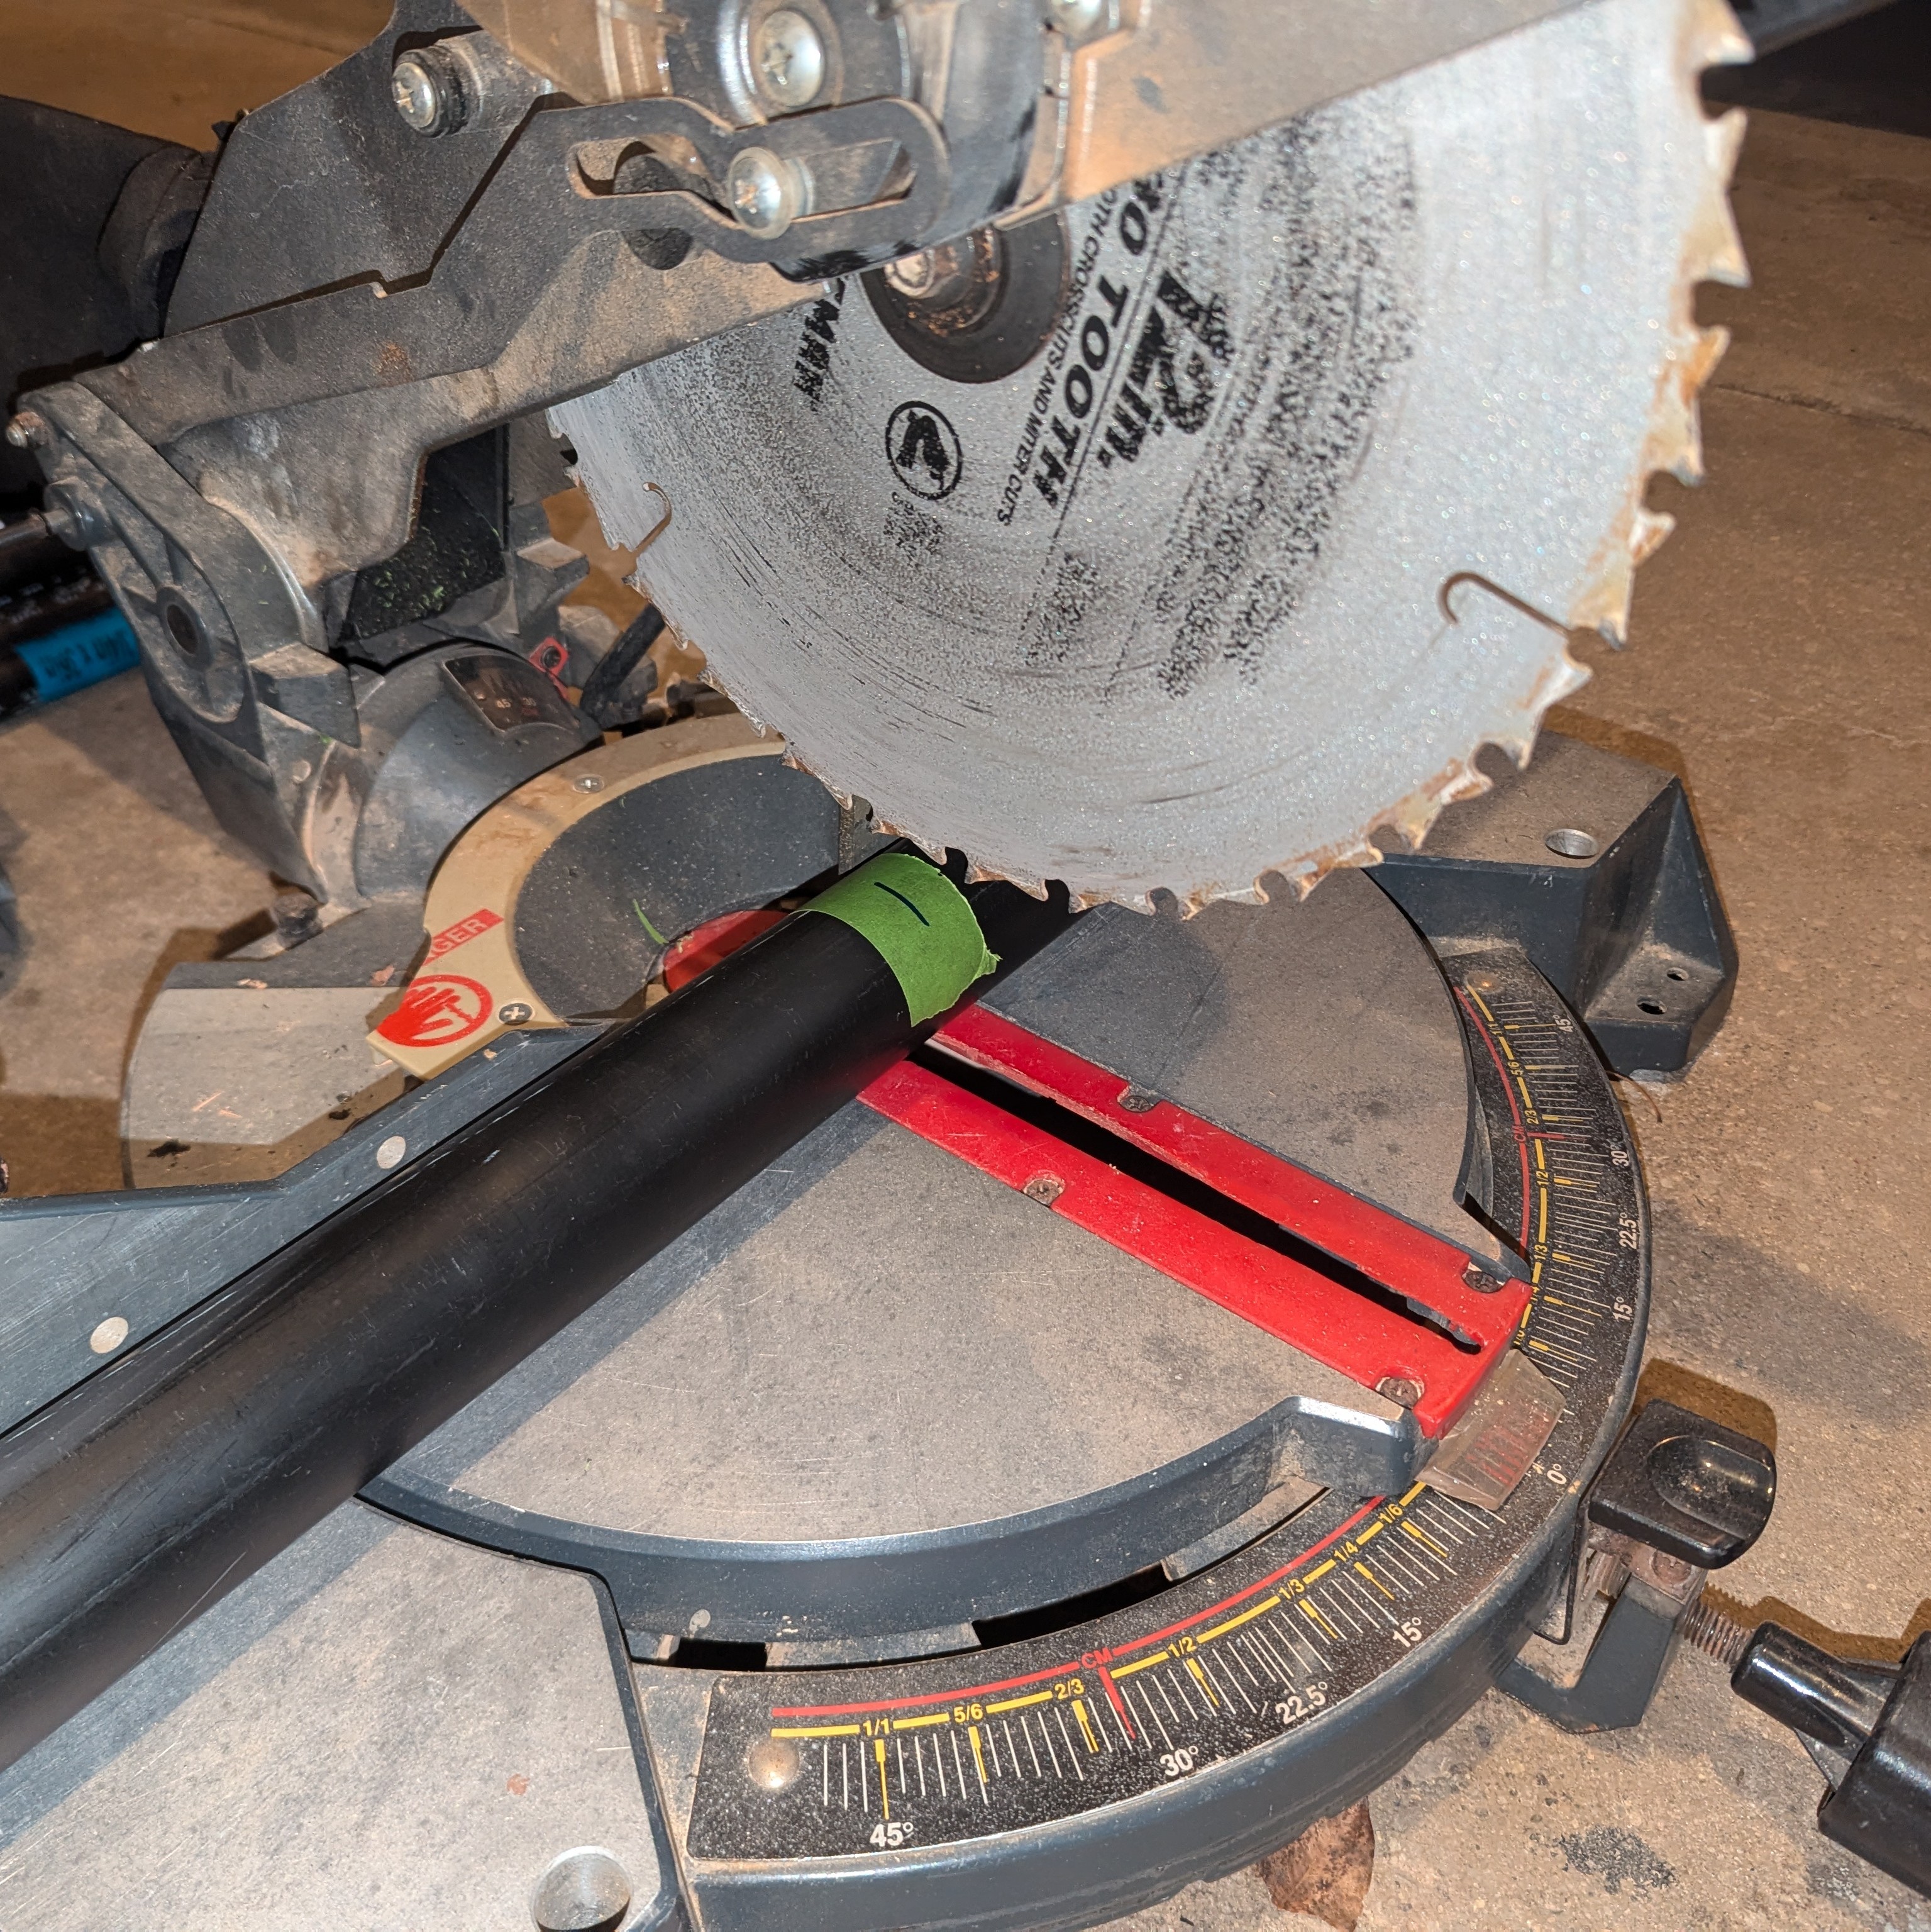
Cut your pipe into 3 peices, each 3ft long
When cutting, it can be difficult to mark the black plastic. Consider placing masking or painters tape roughly near the desired cut, and then marking with a sharpie or pen.
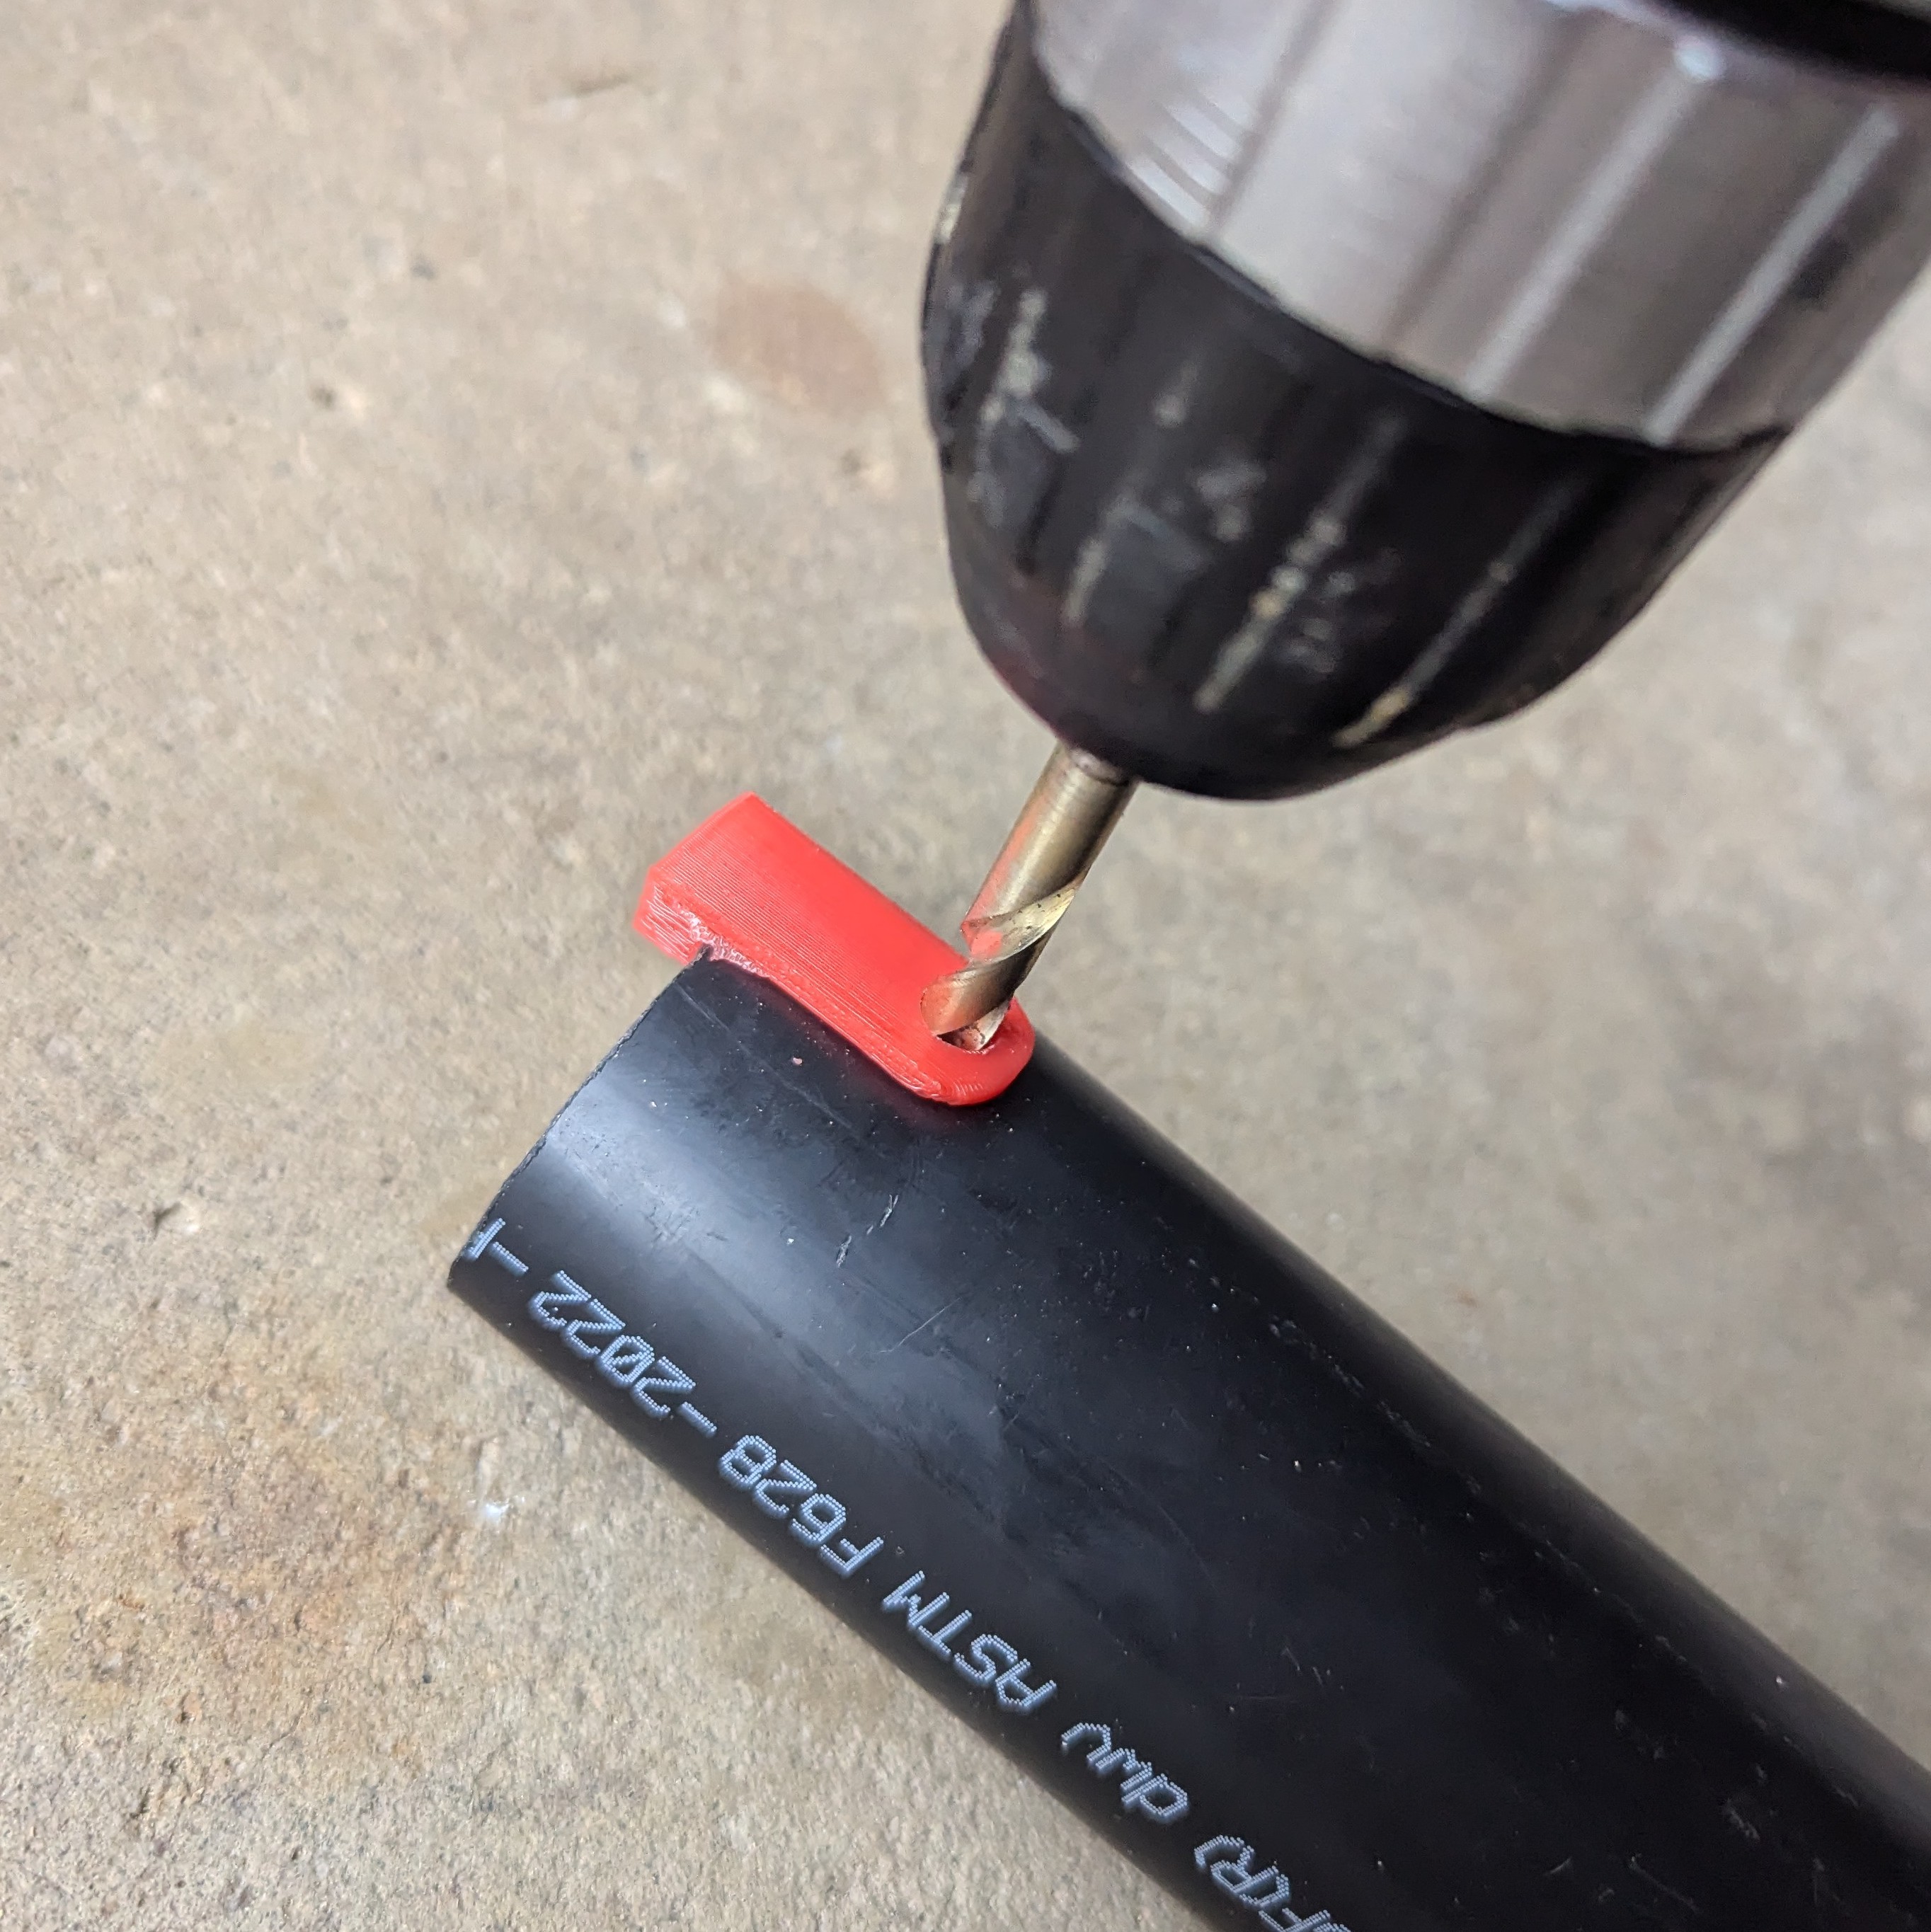
🔨 Step 4 – Drill holes into ABS Pipes
Drill a ¼" hole, 1" from the end on each of the ABS pipes on one side. You can do this easily using the provided jig. Simply line up your drill using the jig, and then drill through the pipe. Repeat this for all three pipes.
Be sure to take caution when drilling your holes through each pipe. The jig does not guarantee the entrance and exit holes are aligned, and you must ensure these are aligned for a good fit with the tripod gusset.
Drill a hole through all three pipes using the jig
The 3D printed tripod gusset may also serve as a secondary jig to ensure the holes in the ABS pipe are aligned.
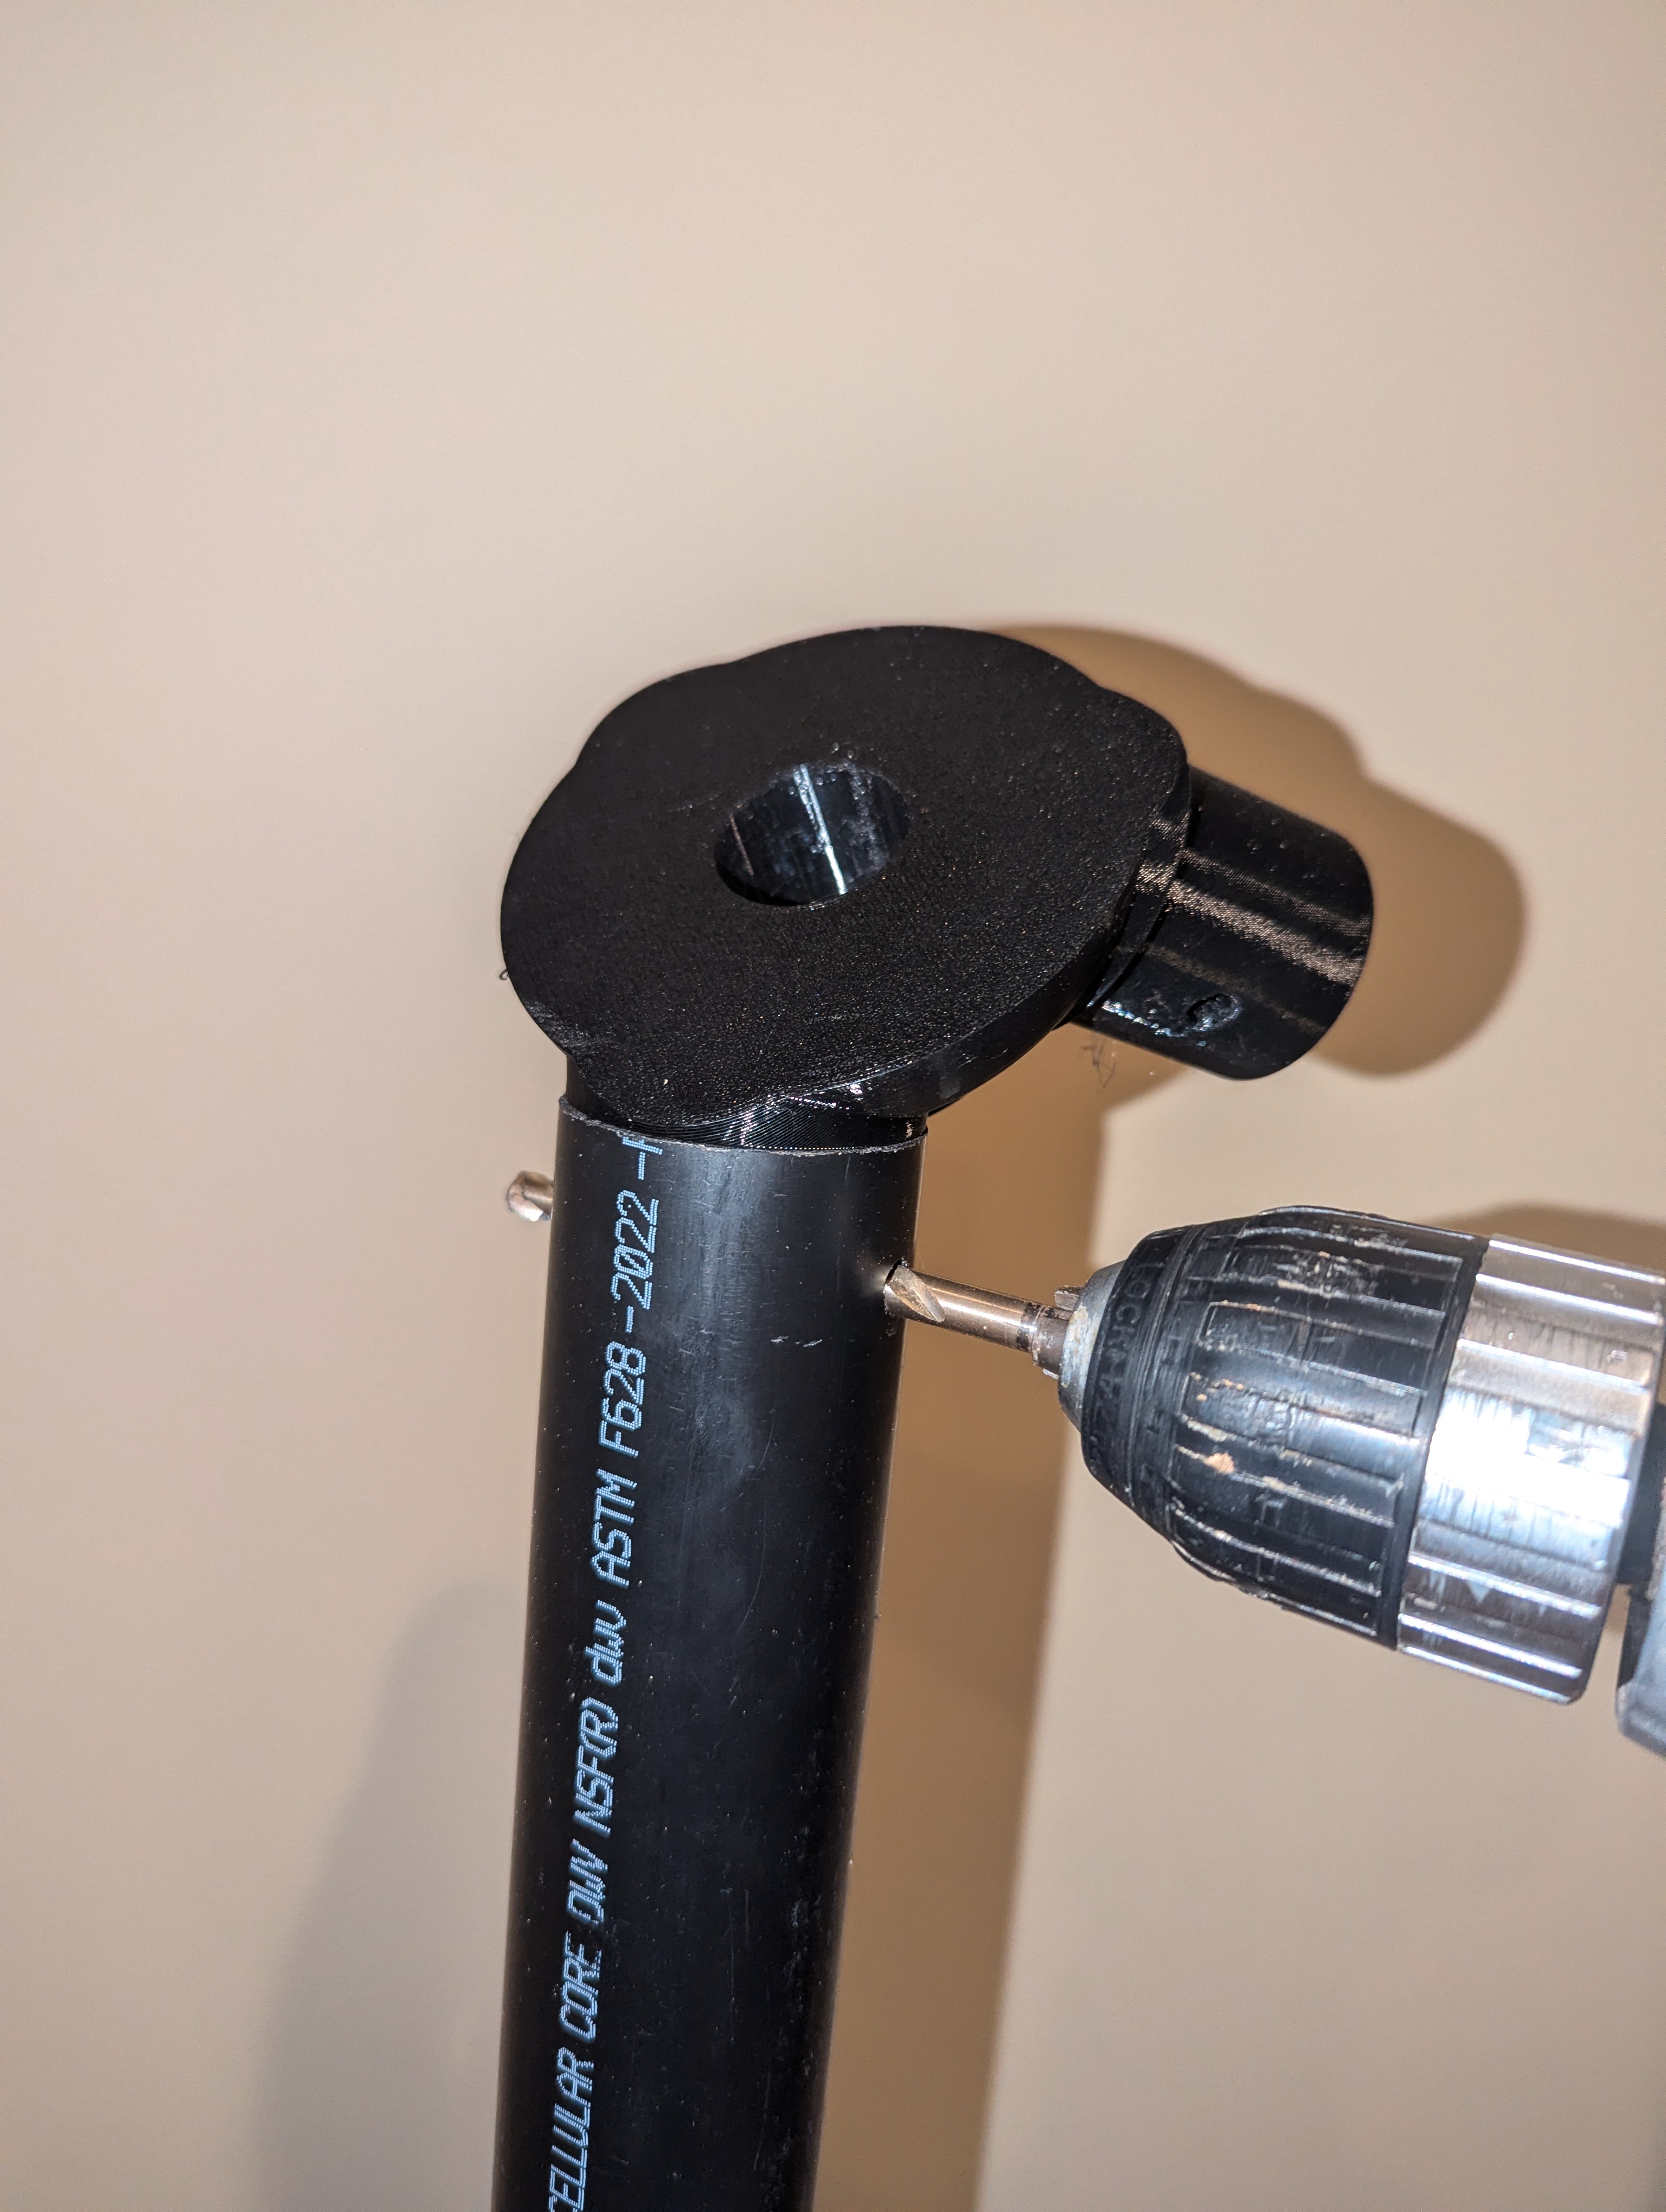
Use the tripod gusset to check if the holes are aligned
🧩 Step 5 – Add TPU Feet onto ABS Pipes
In the side opposite of the hole you just drilled, insert the 3D printed feet into the bottom of each pipe. Apply light pressure until the feet stay inside the end of the pipe.
Ensure you do this for the side of the pipe opposite of the side where you just drilled the hole through the pipes. Repeat for all three pipes.
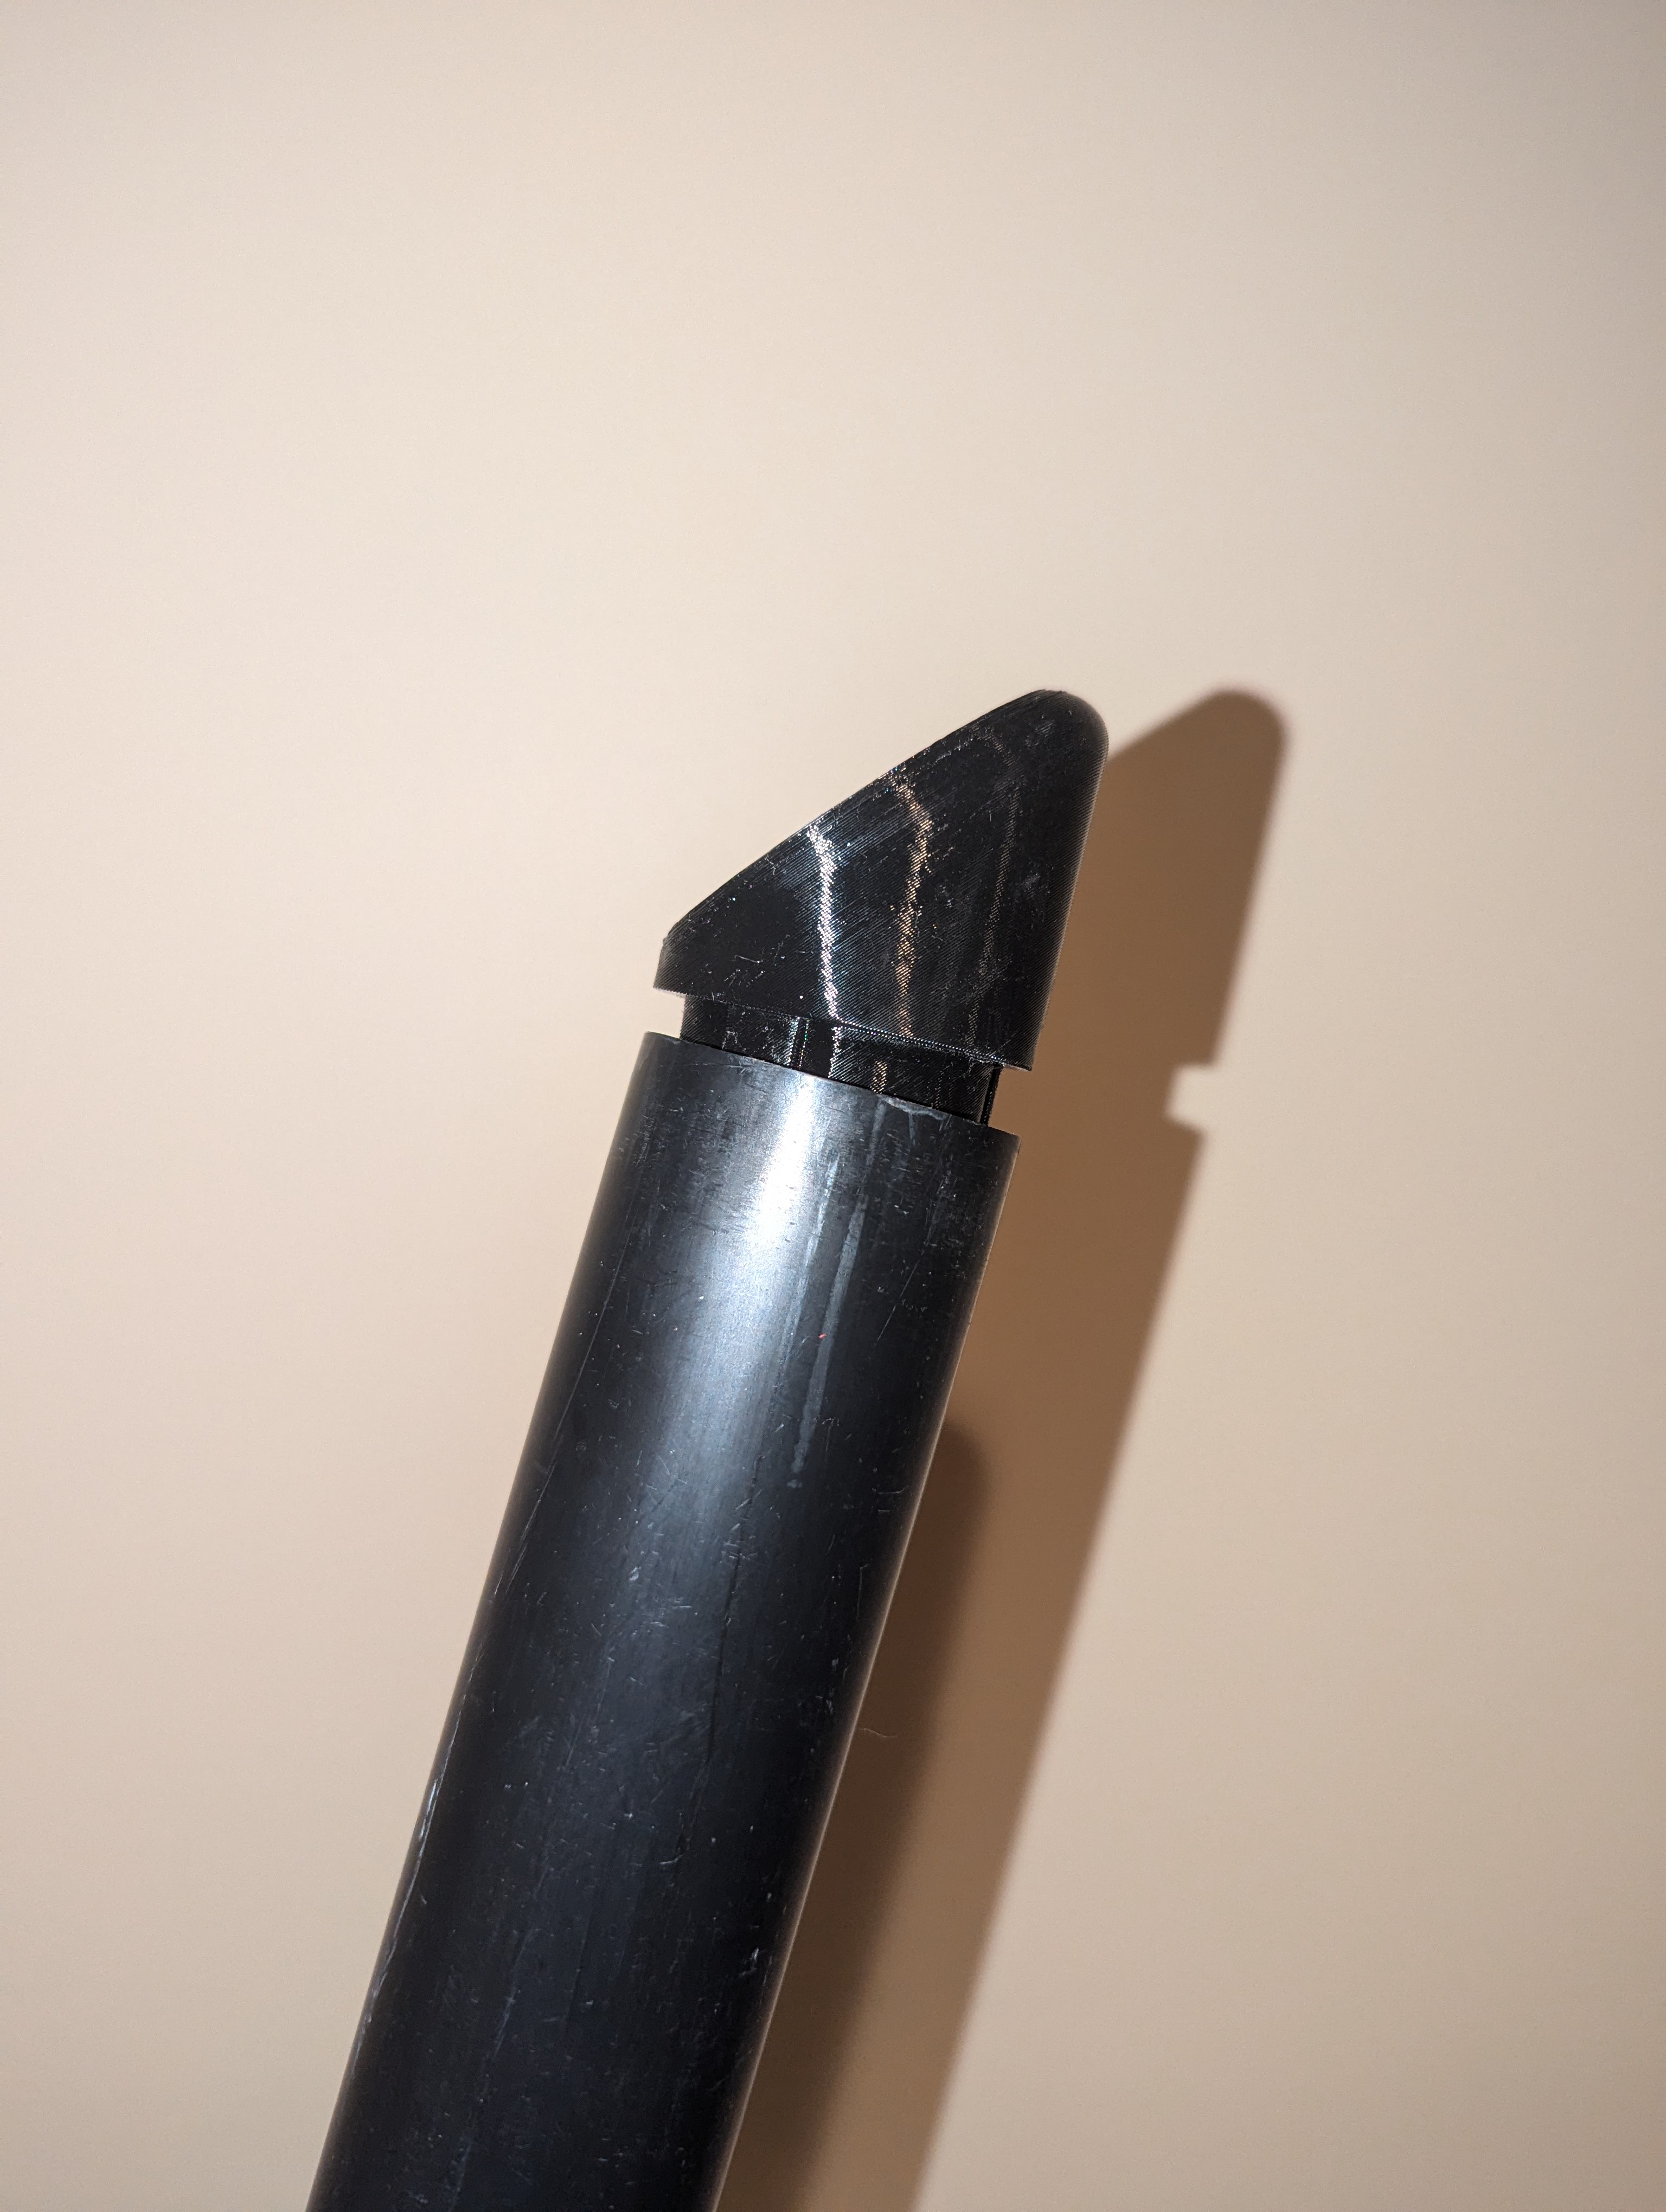
Slide the TPU feet into each of the ABS pipes
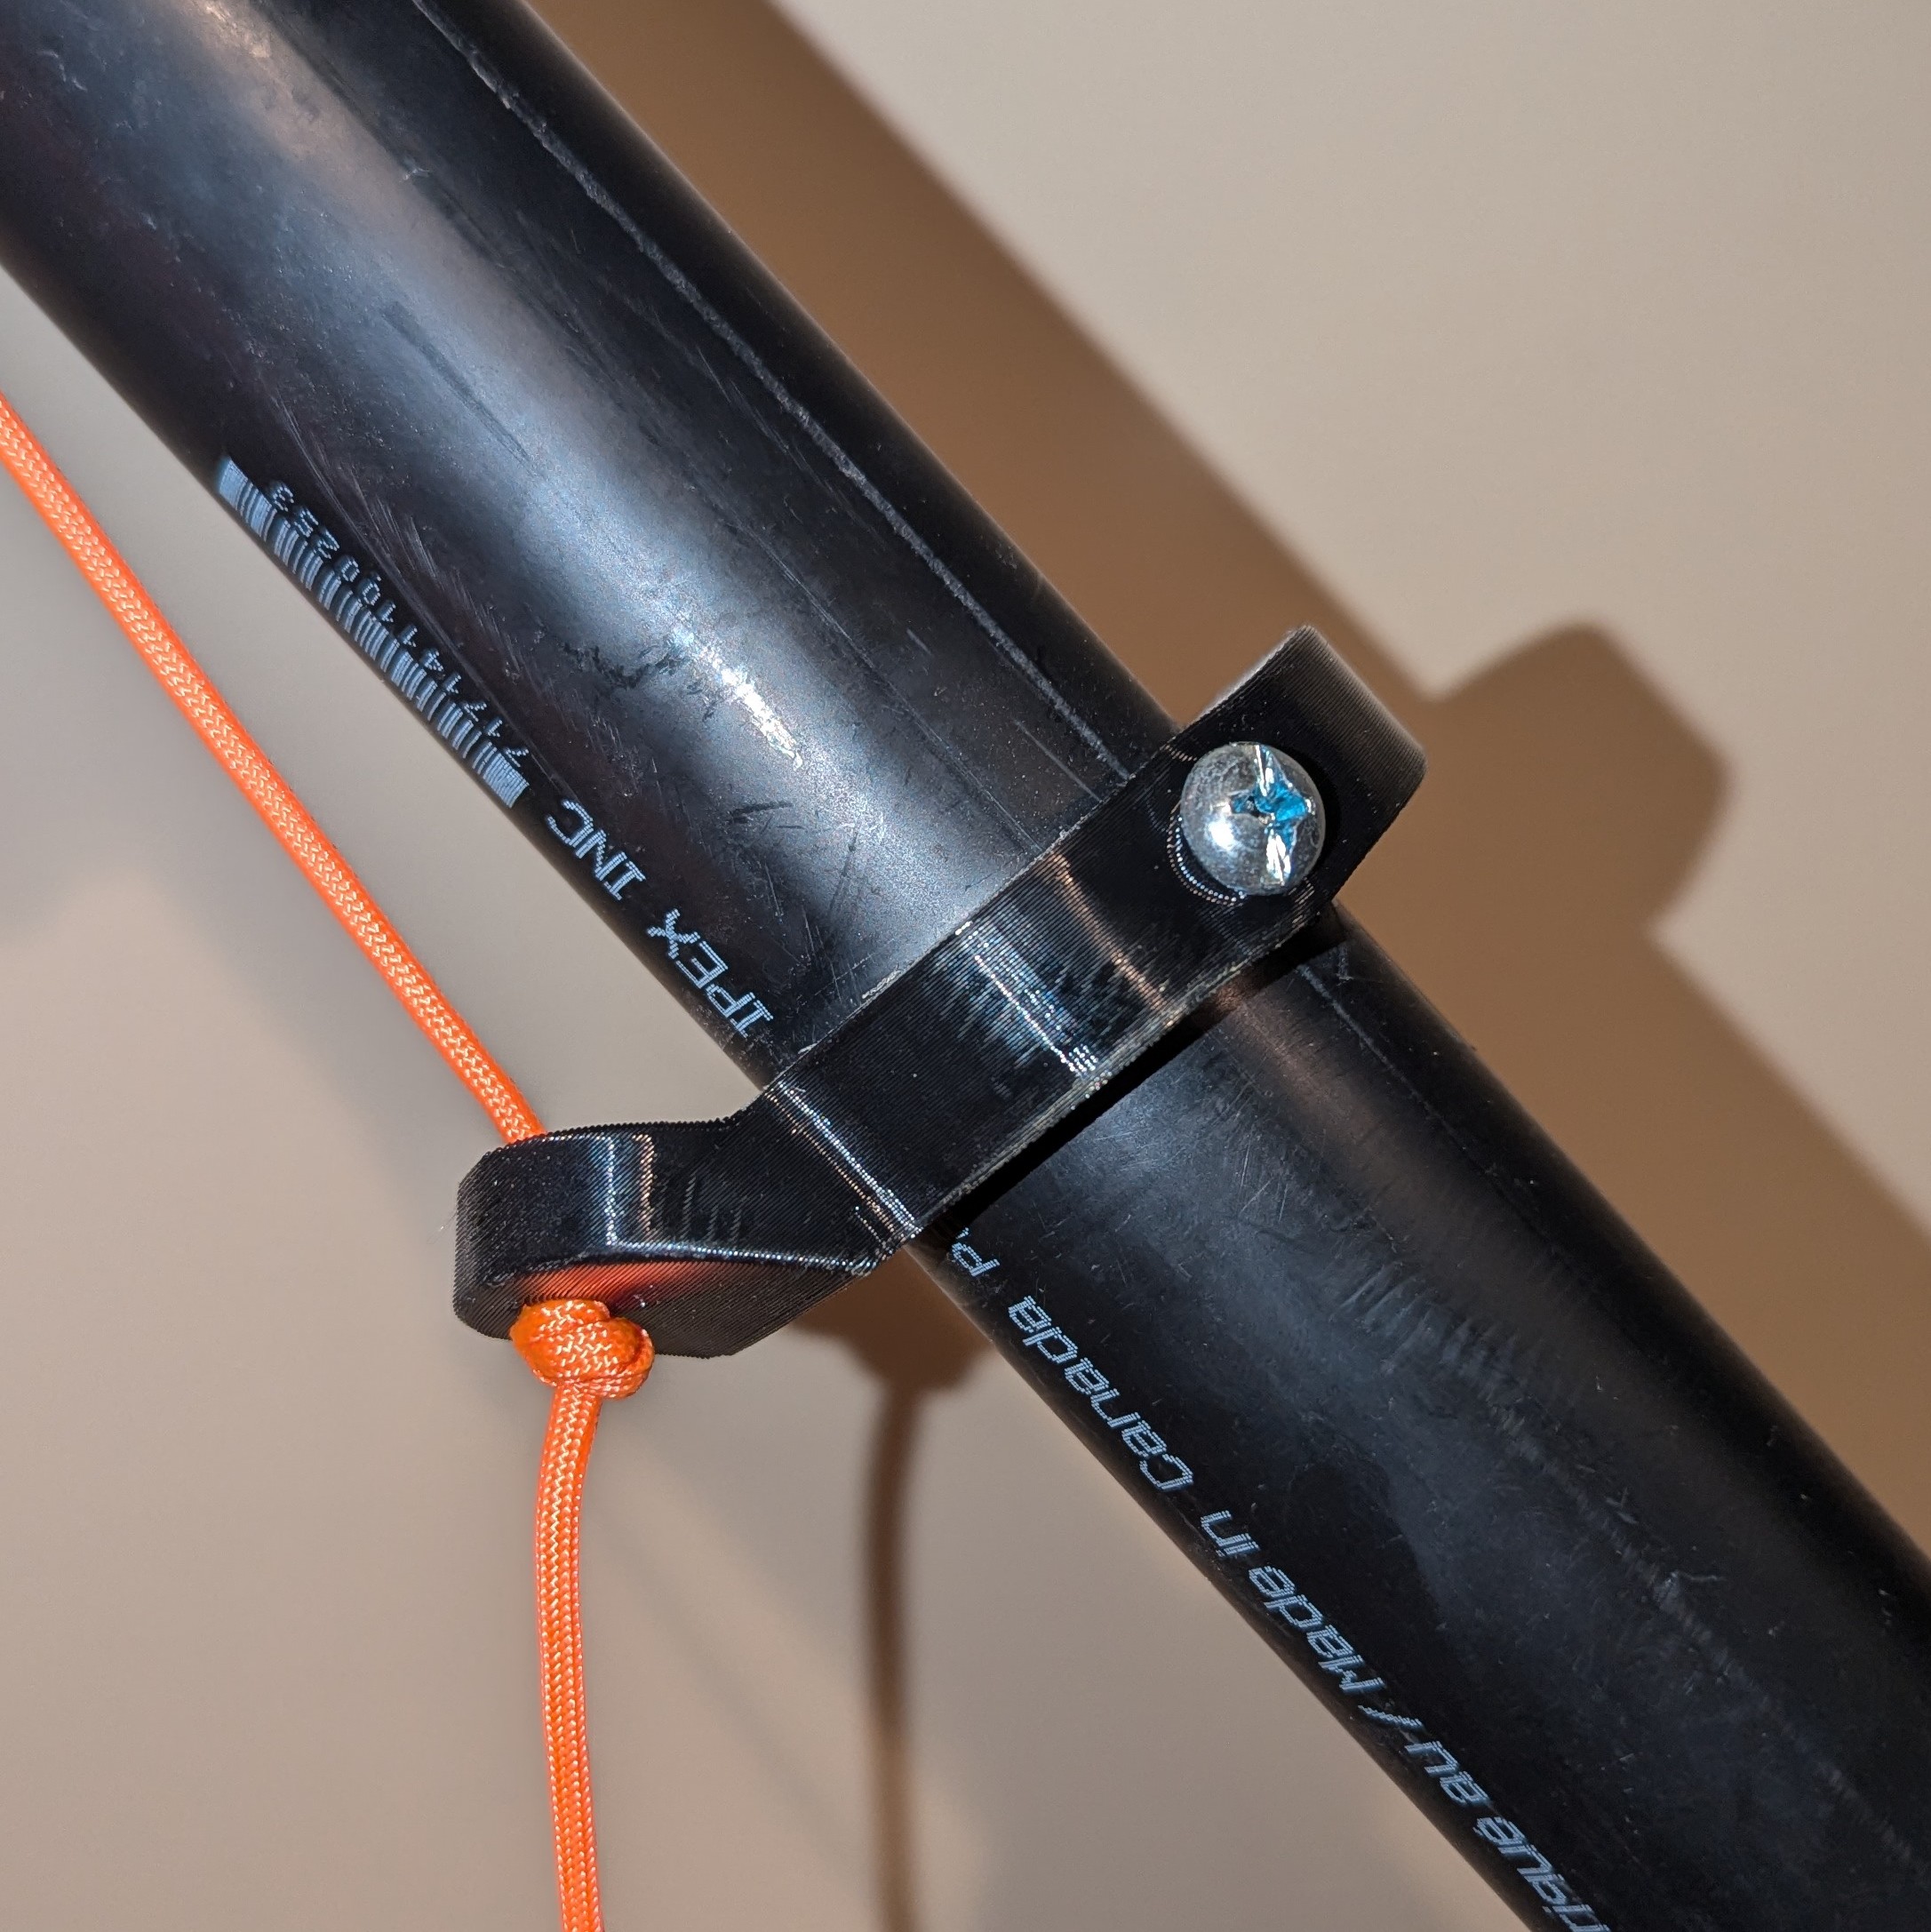
🧩 Step 6 – Slide on Tieoff & Add Hardware
Slide the paracord tieoff around the outer diameter of the ABS pipe. It should be snug, and give some resistance as you slide it. Fit nuts into both slots and partially thread a 0.5” ¼-20 Machine Screw. Be sure to only partially thread it for now.
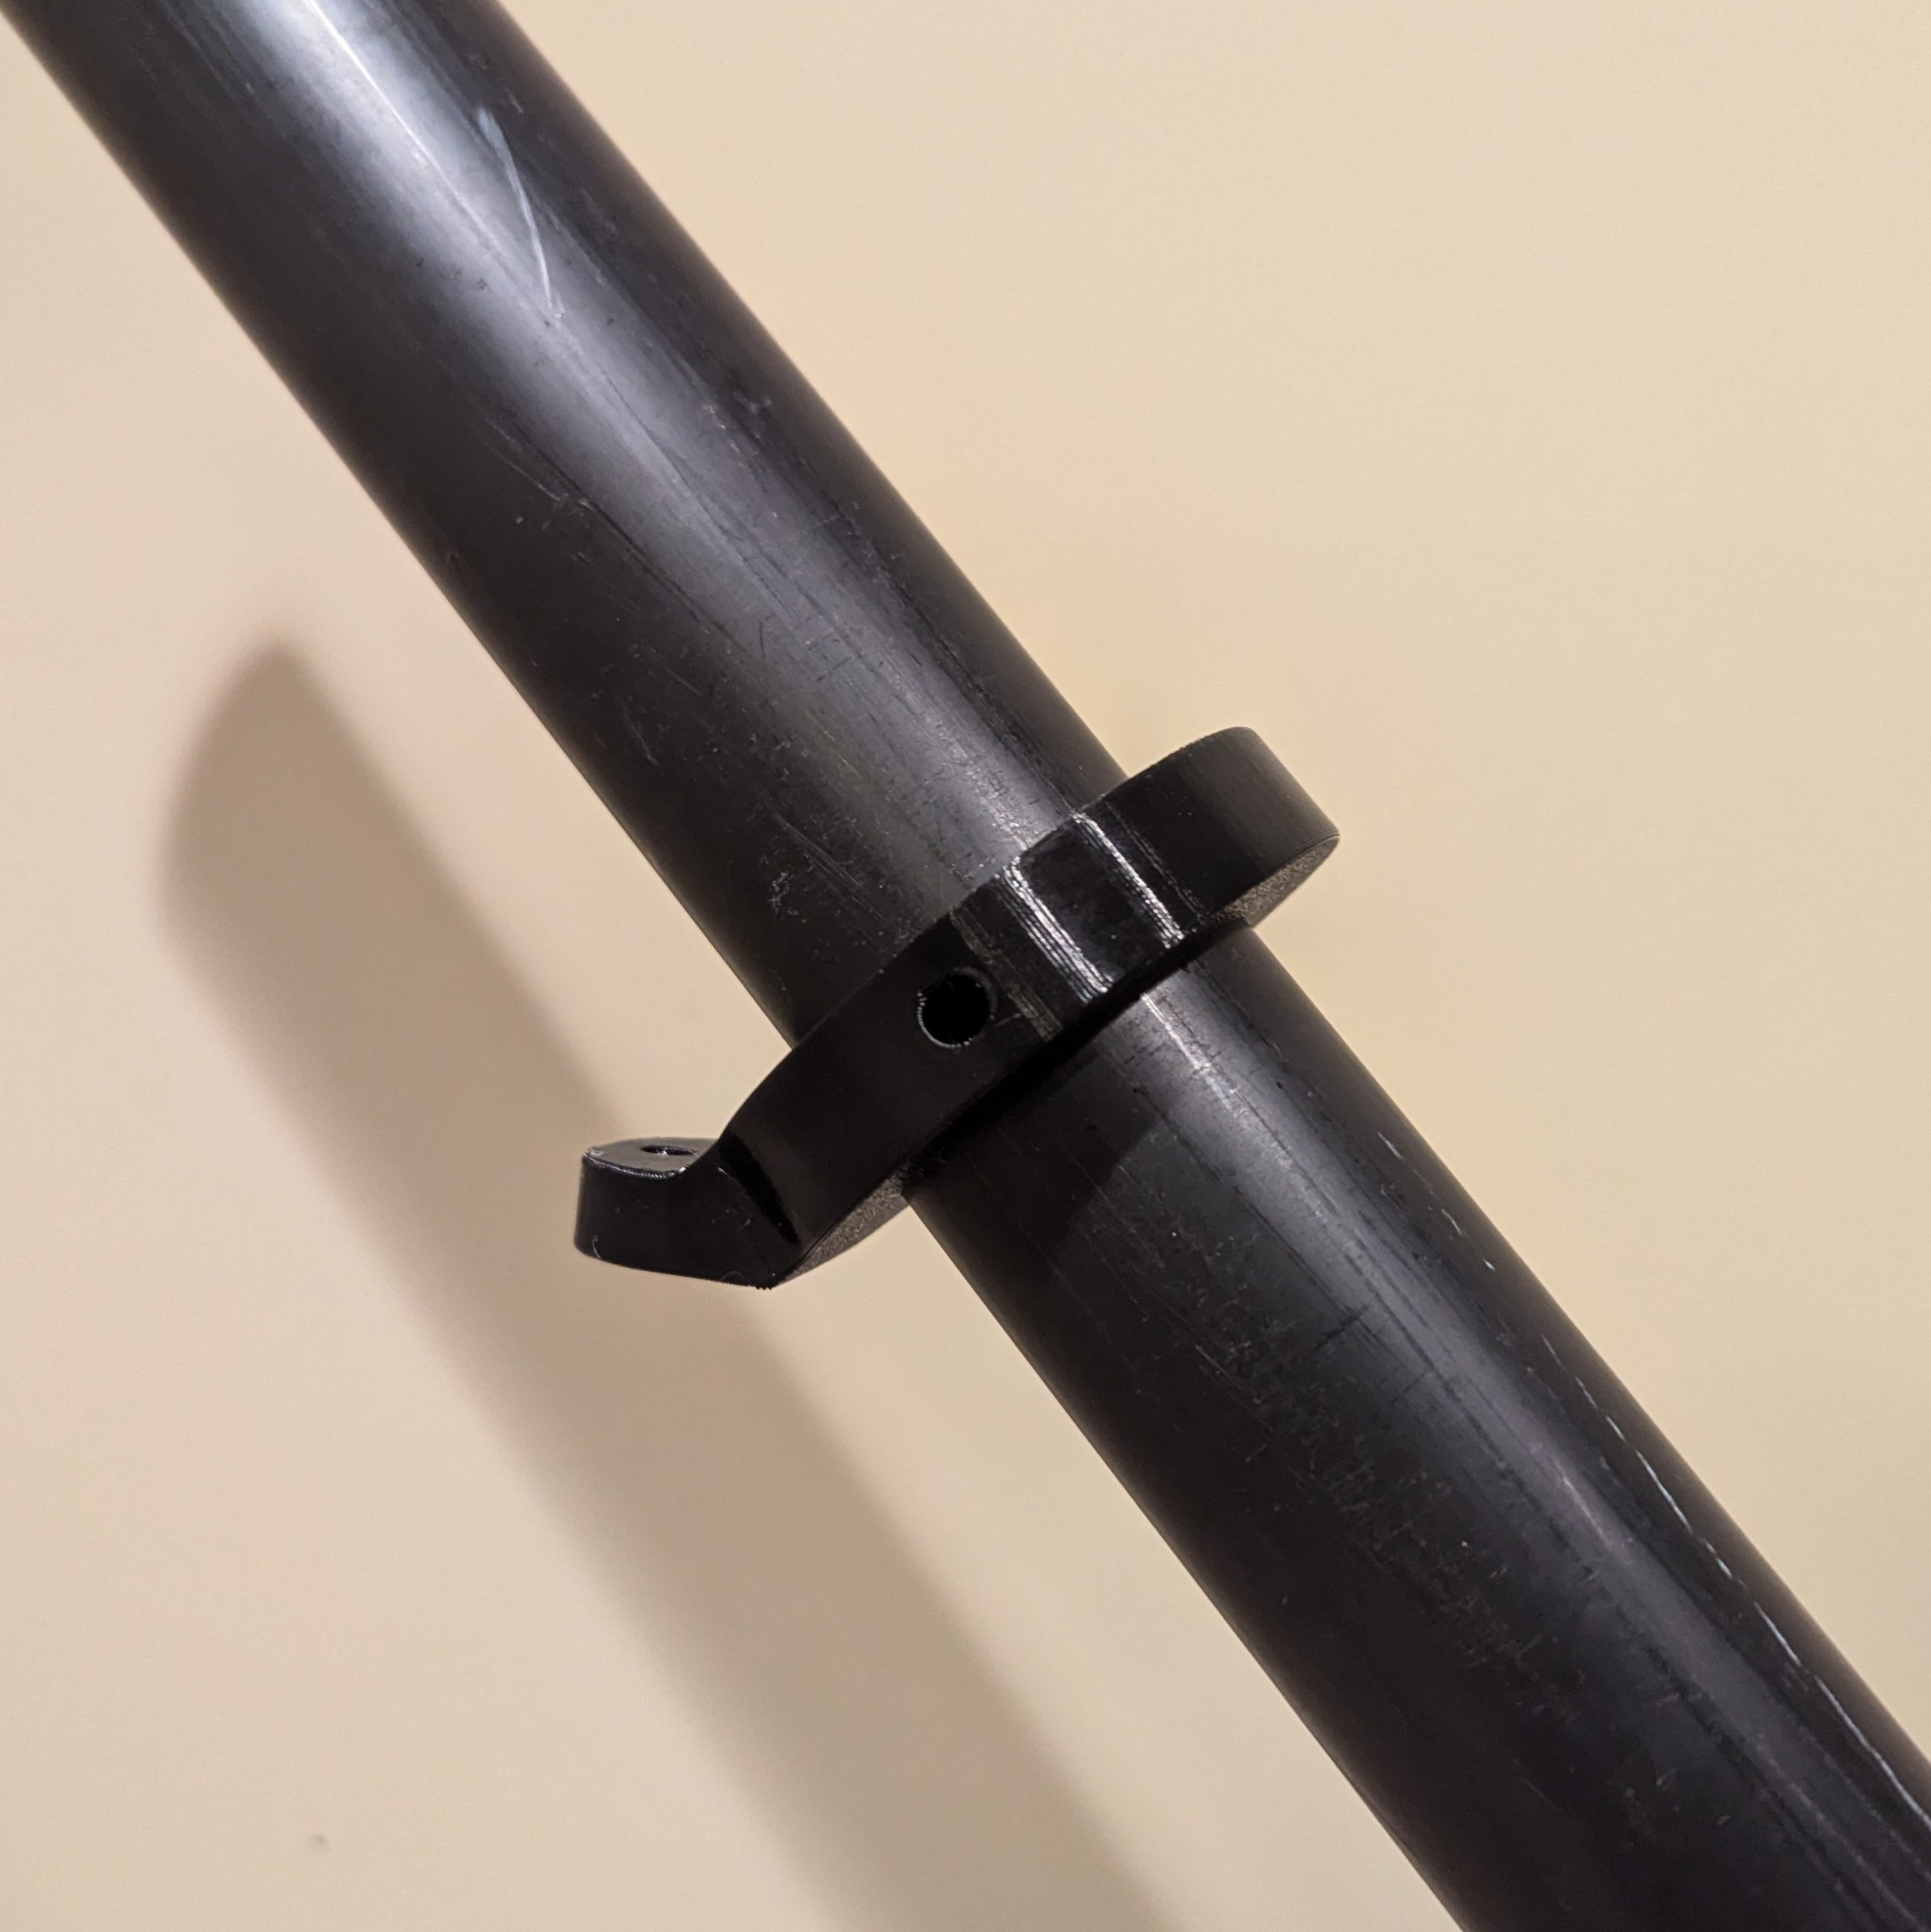
Slide the tieoff up onto your ABS pipe
Partially thread the screw into the tieoff
🔁 REPEAT STEPS 4-6 FOR THE OTHER TWO PIPES
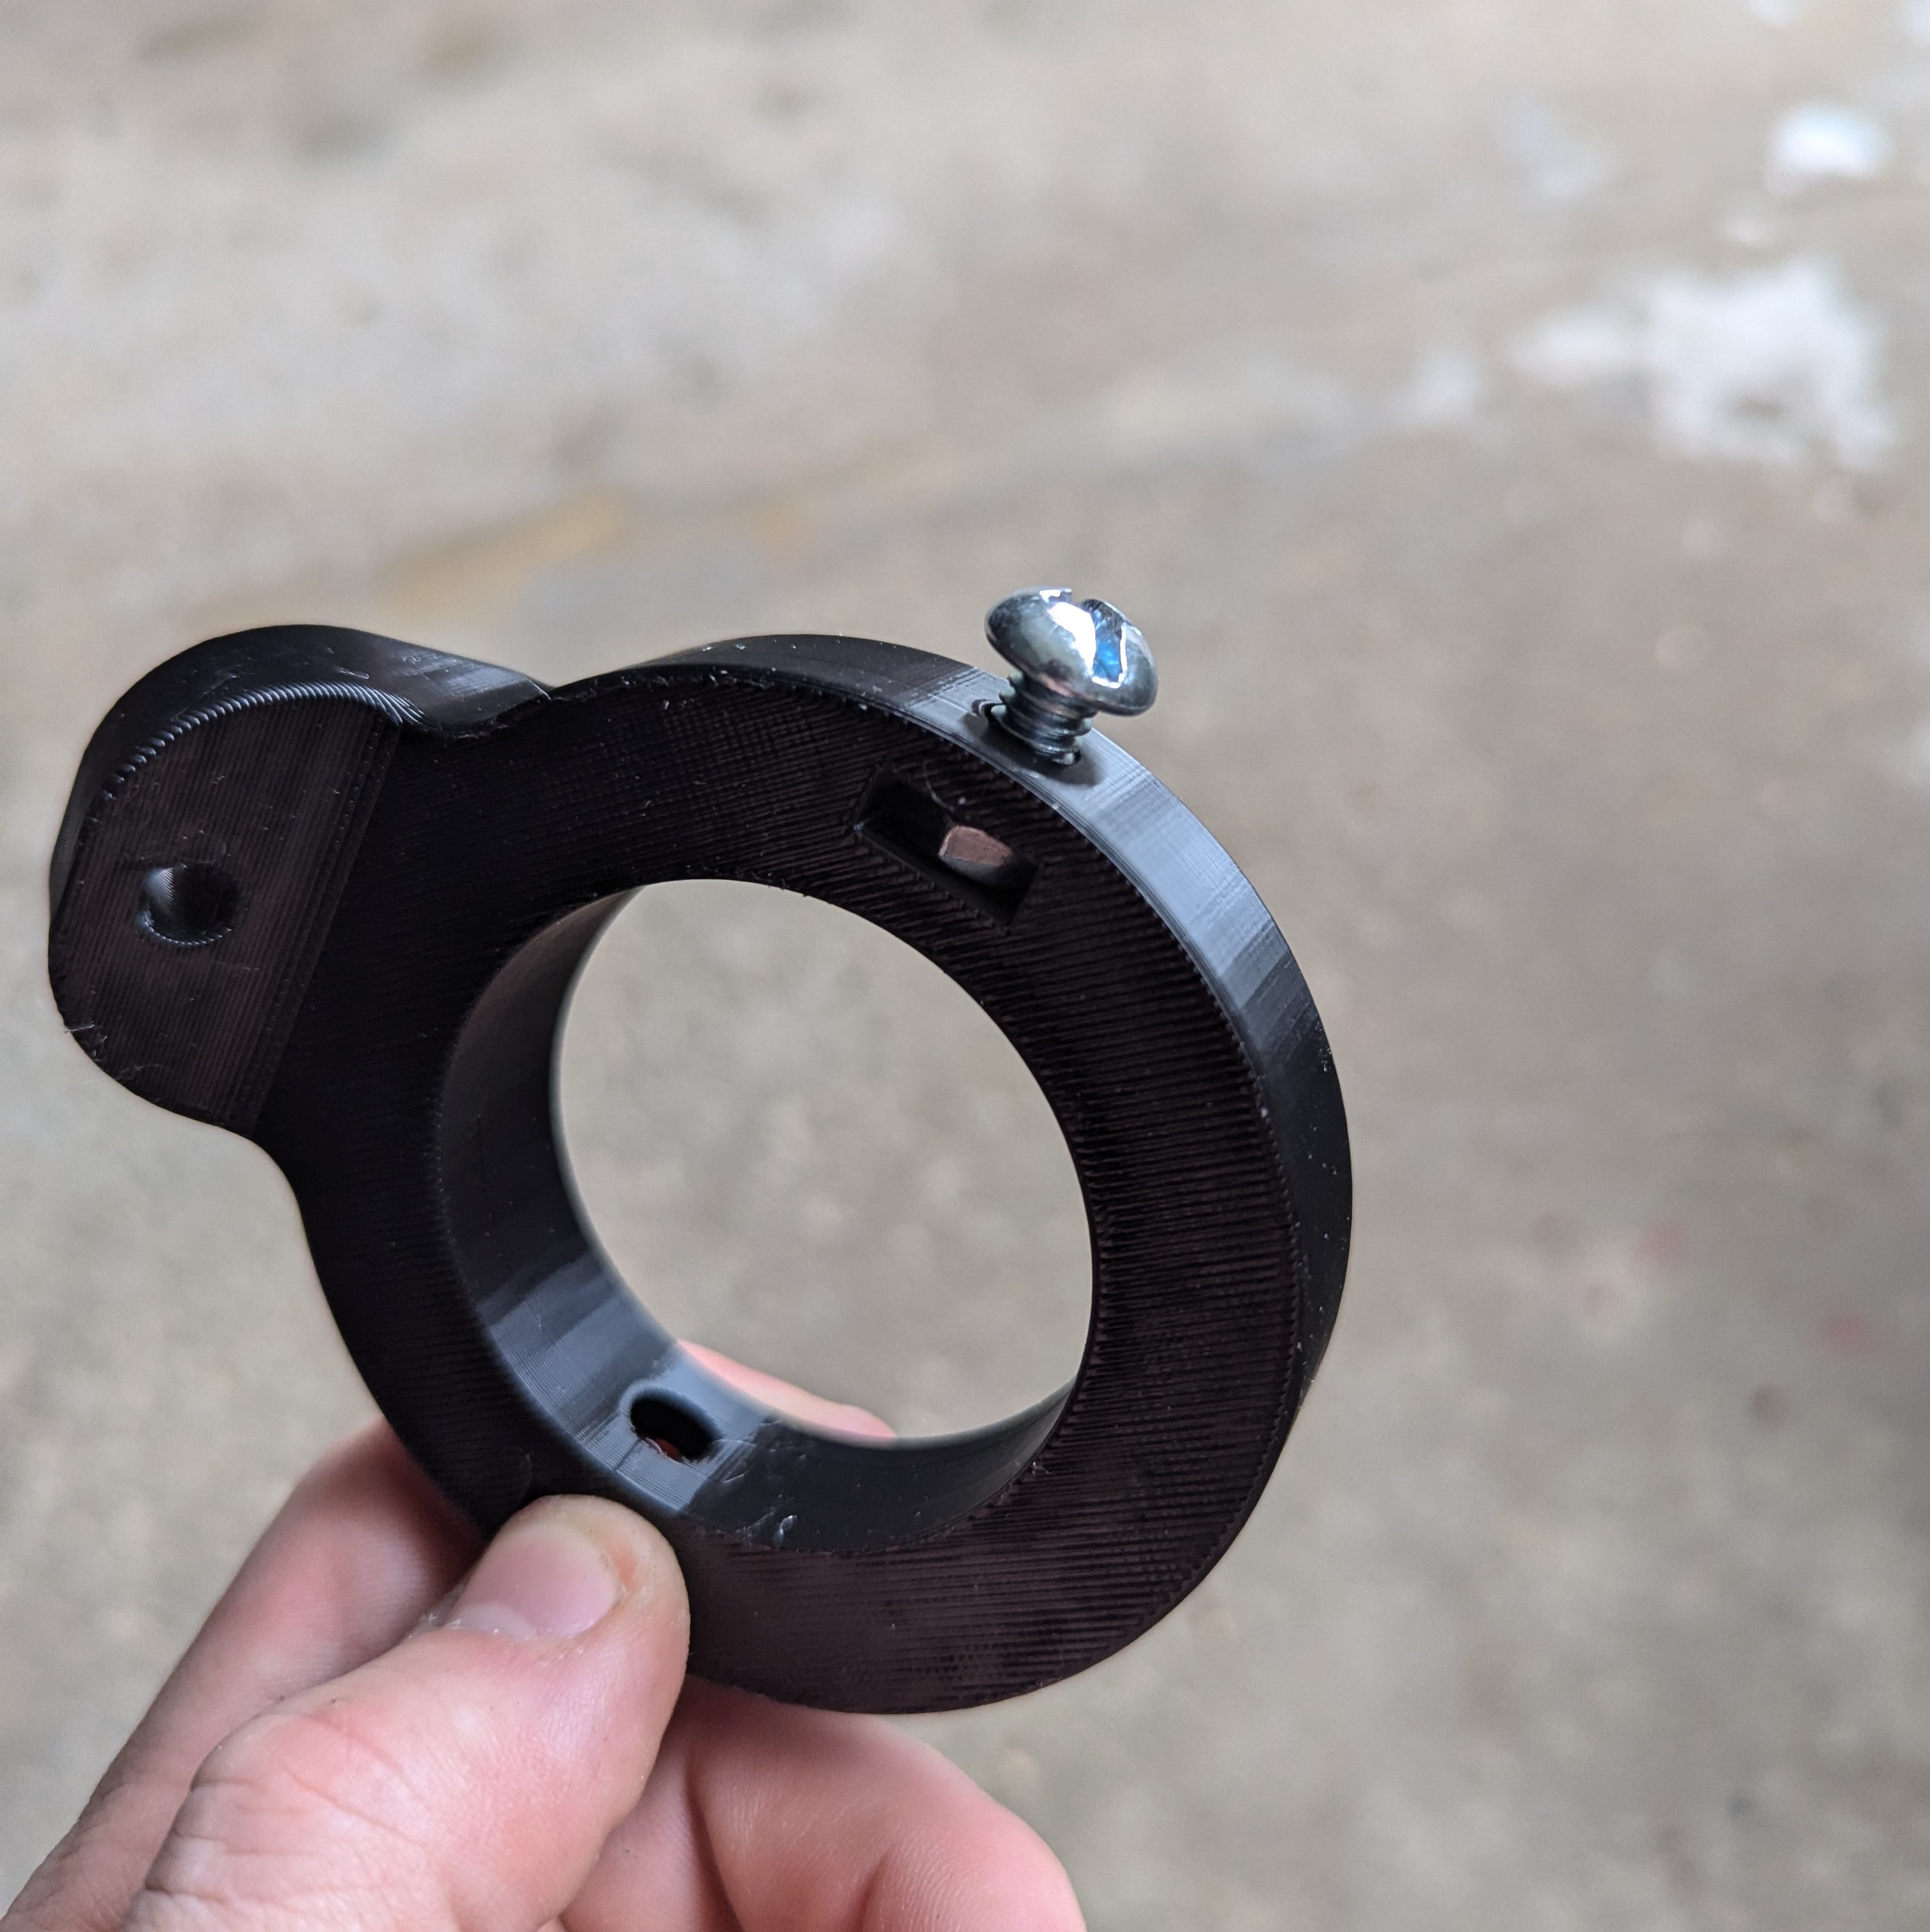
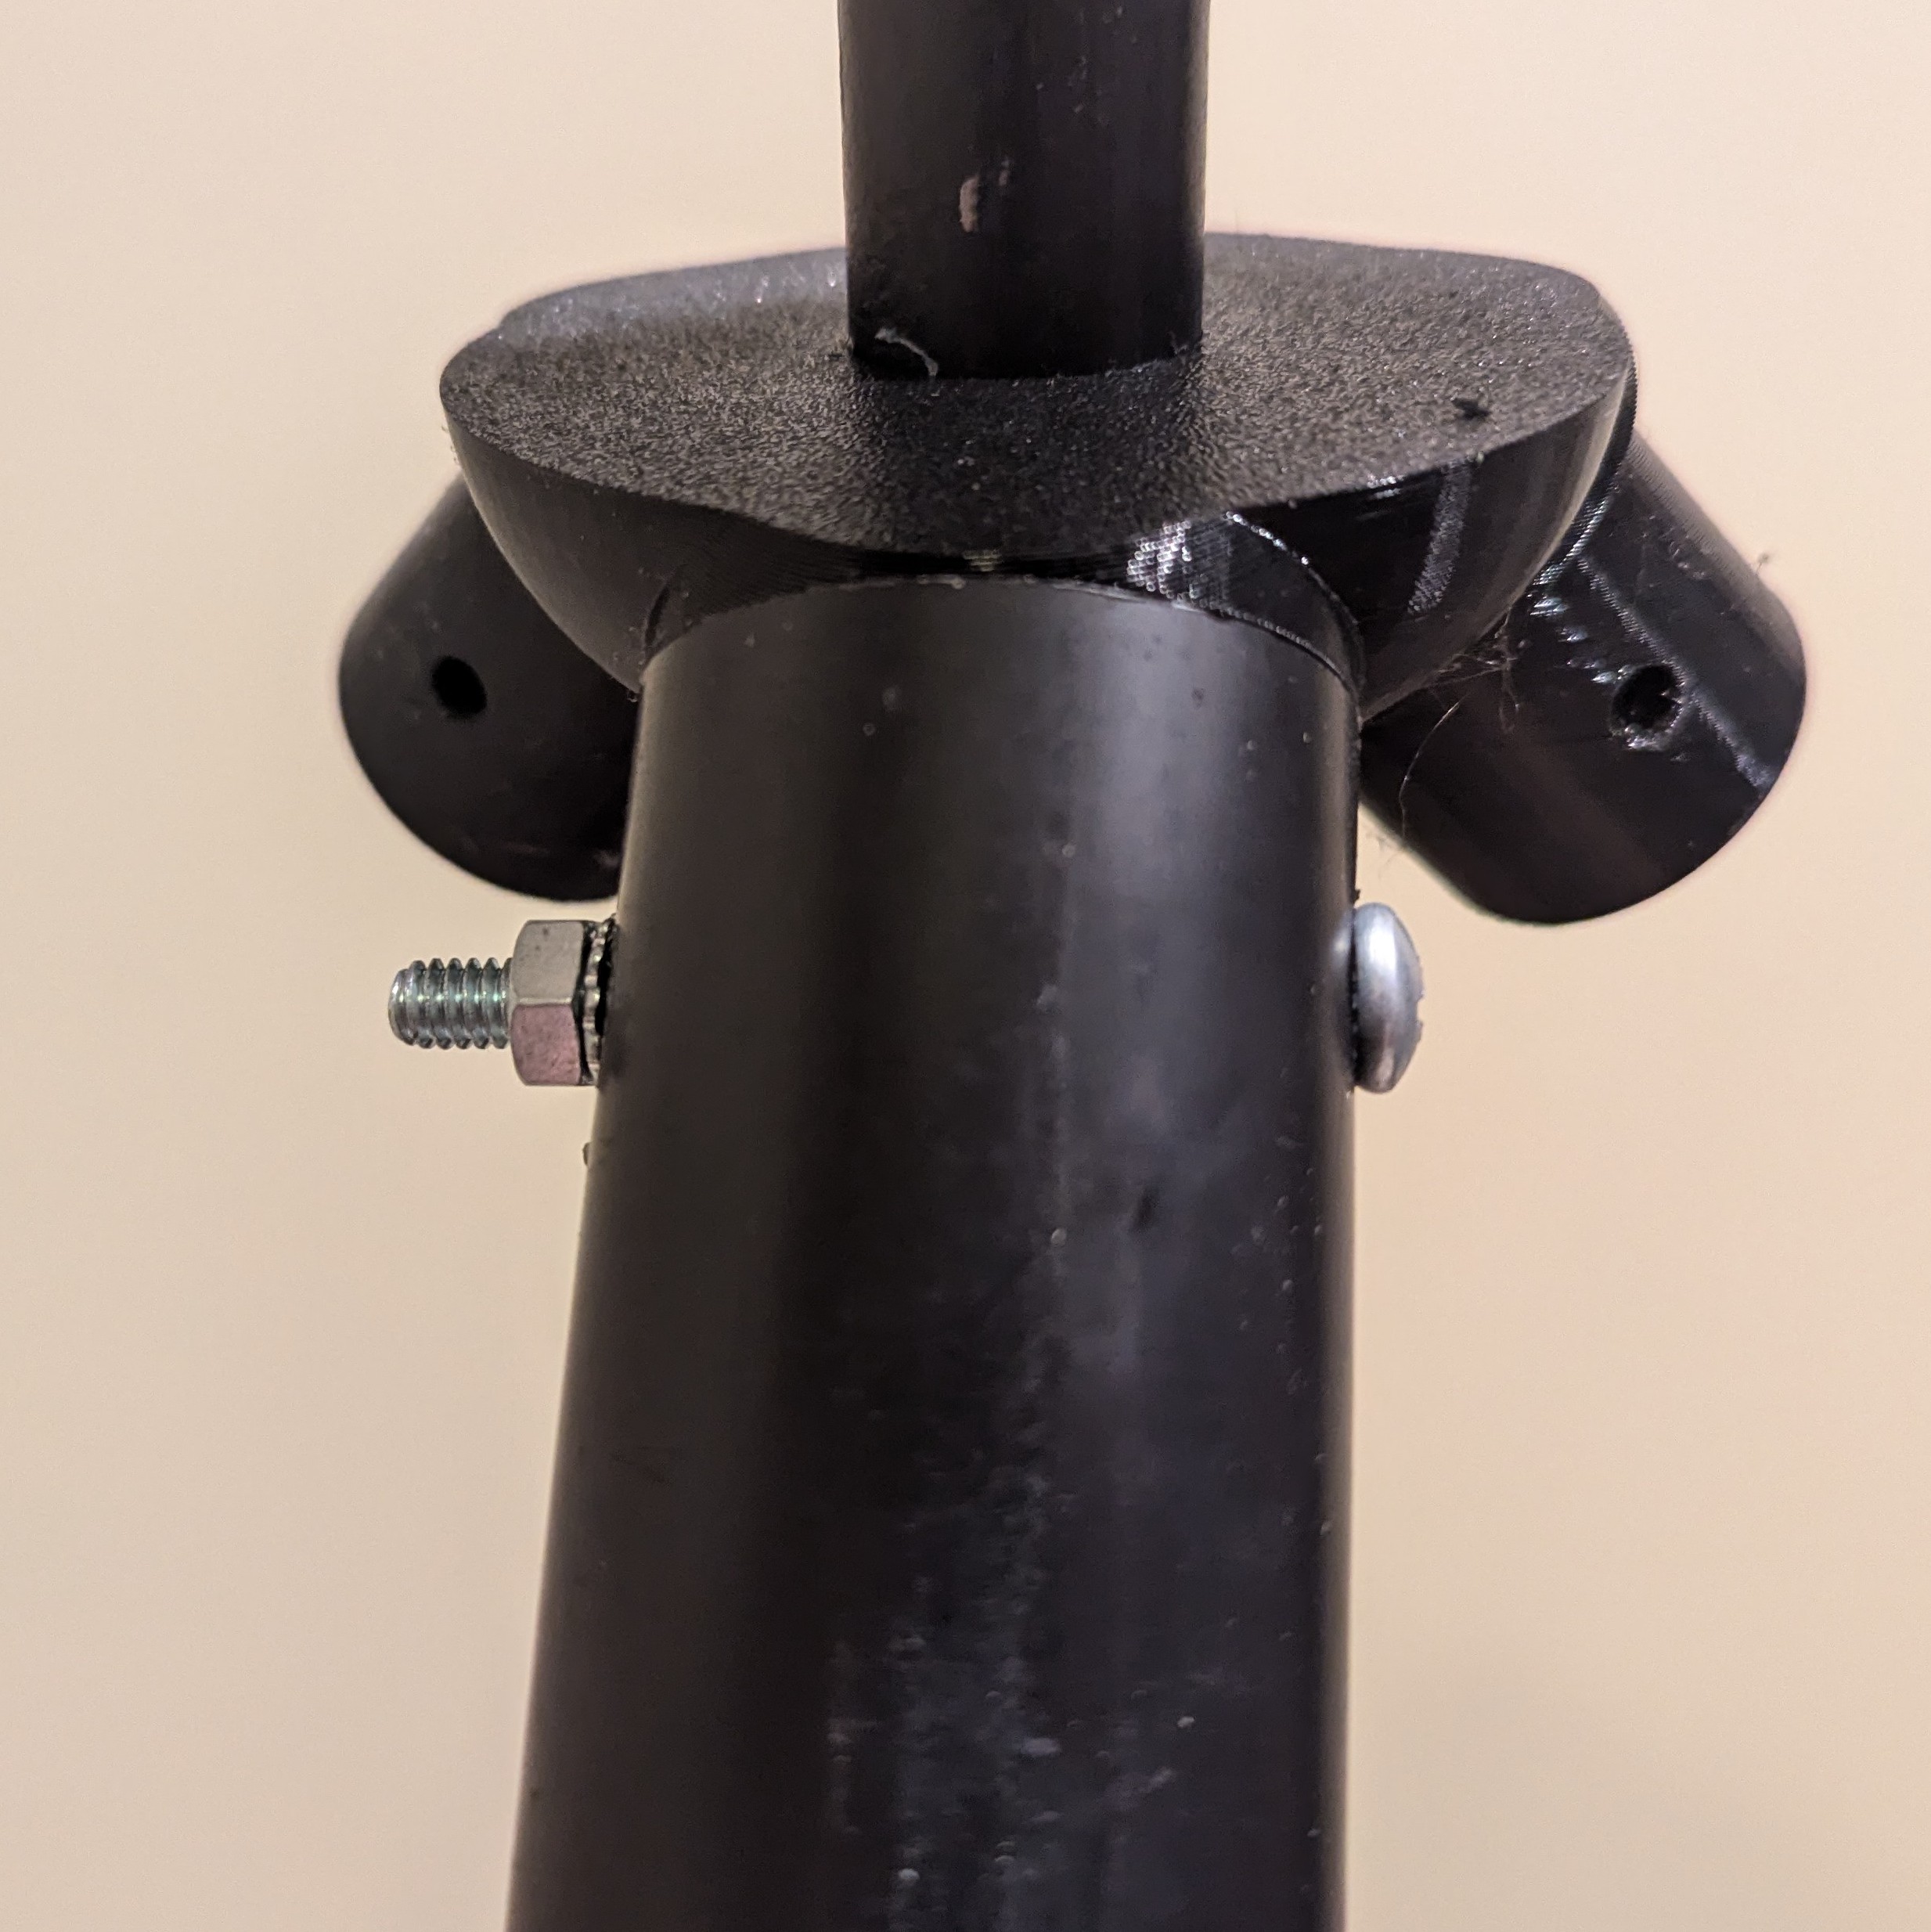
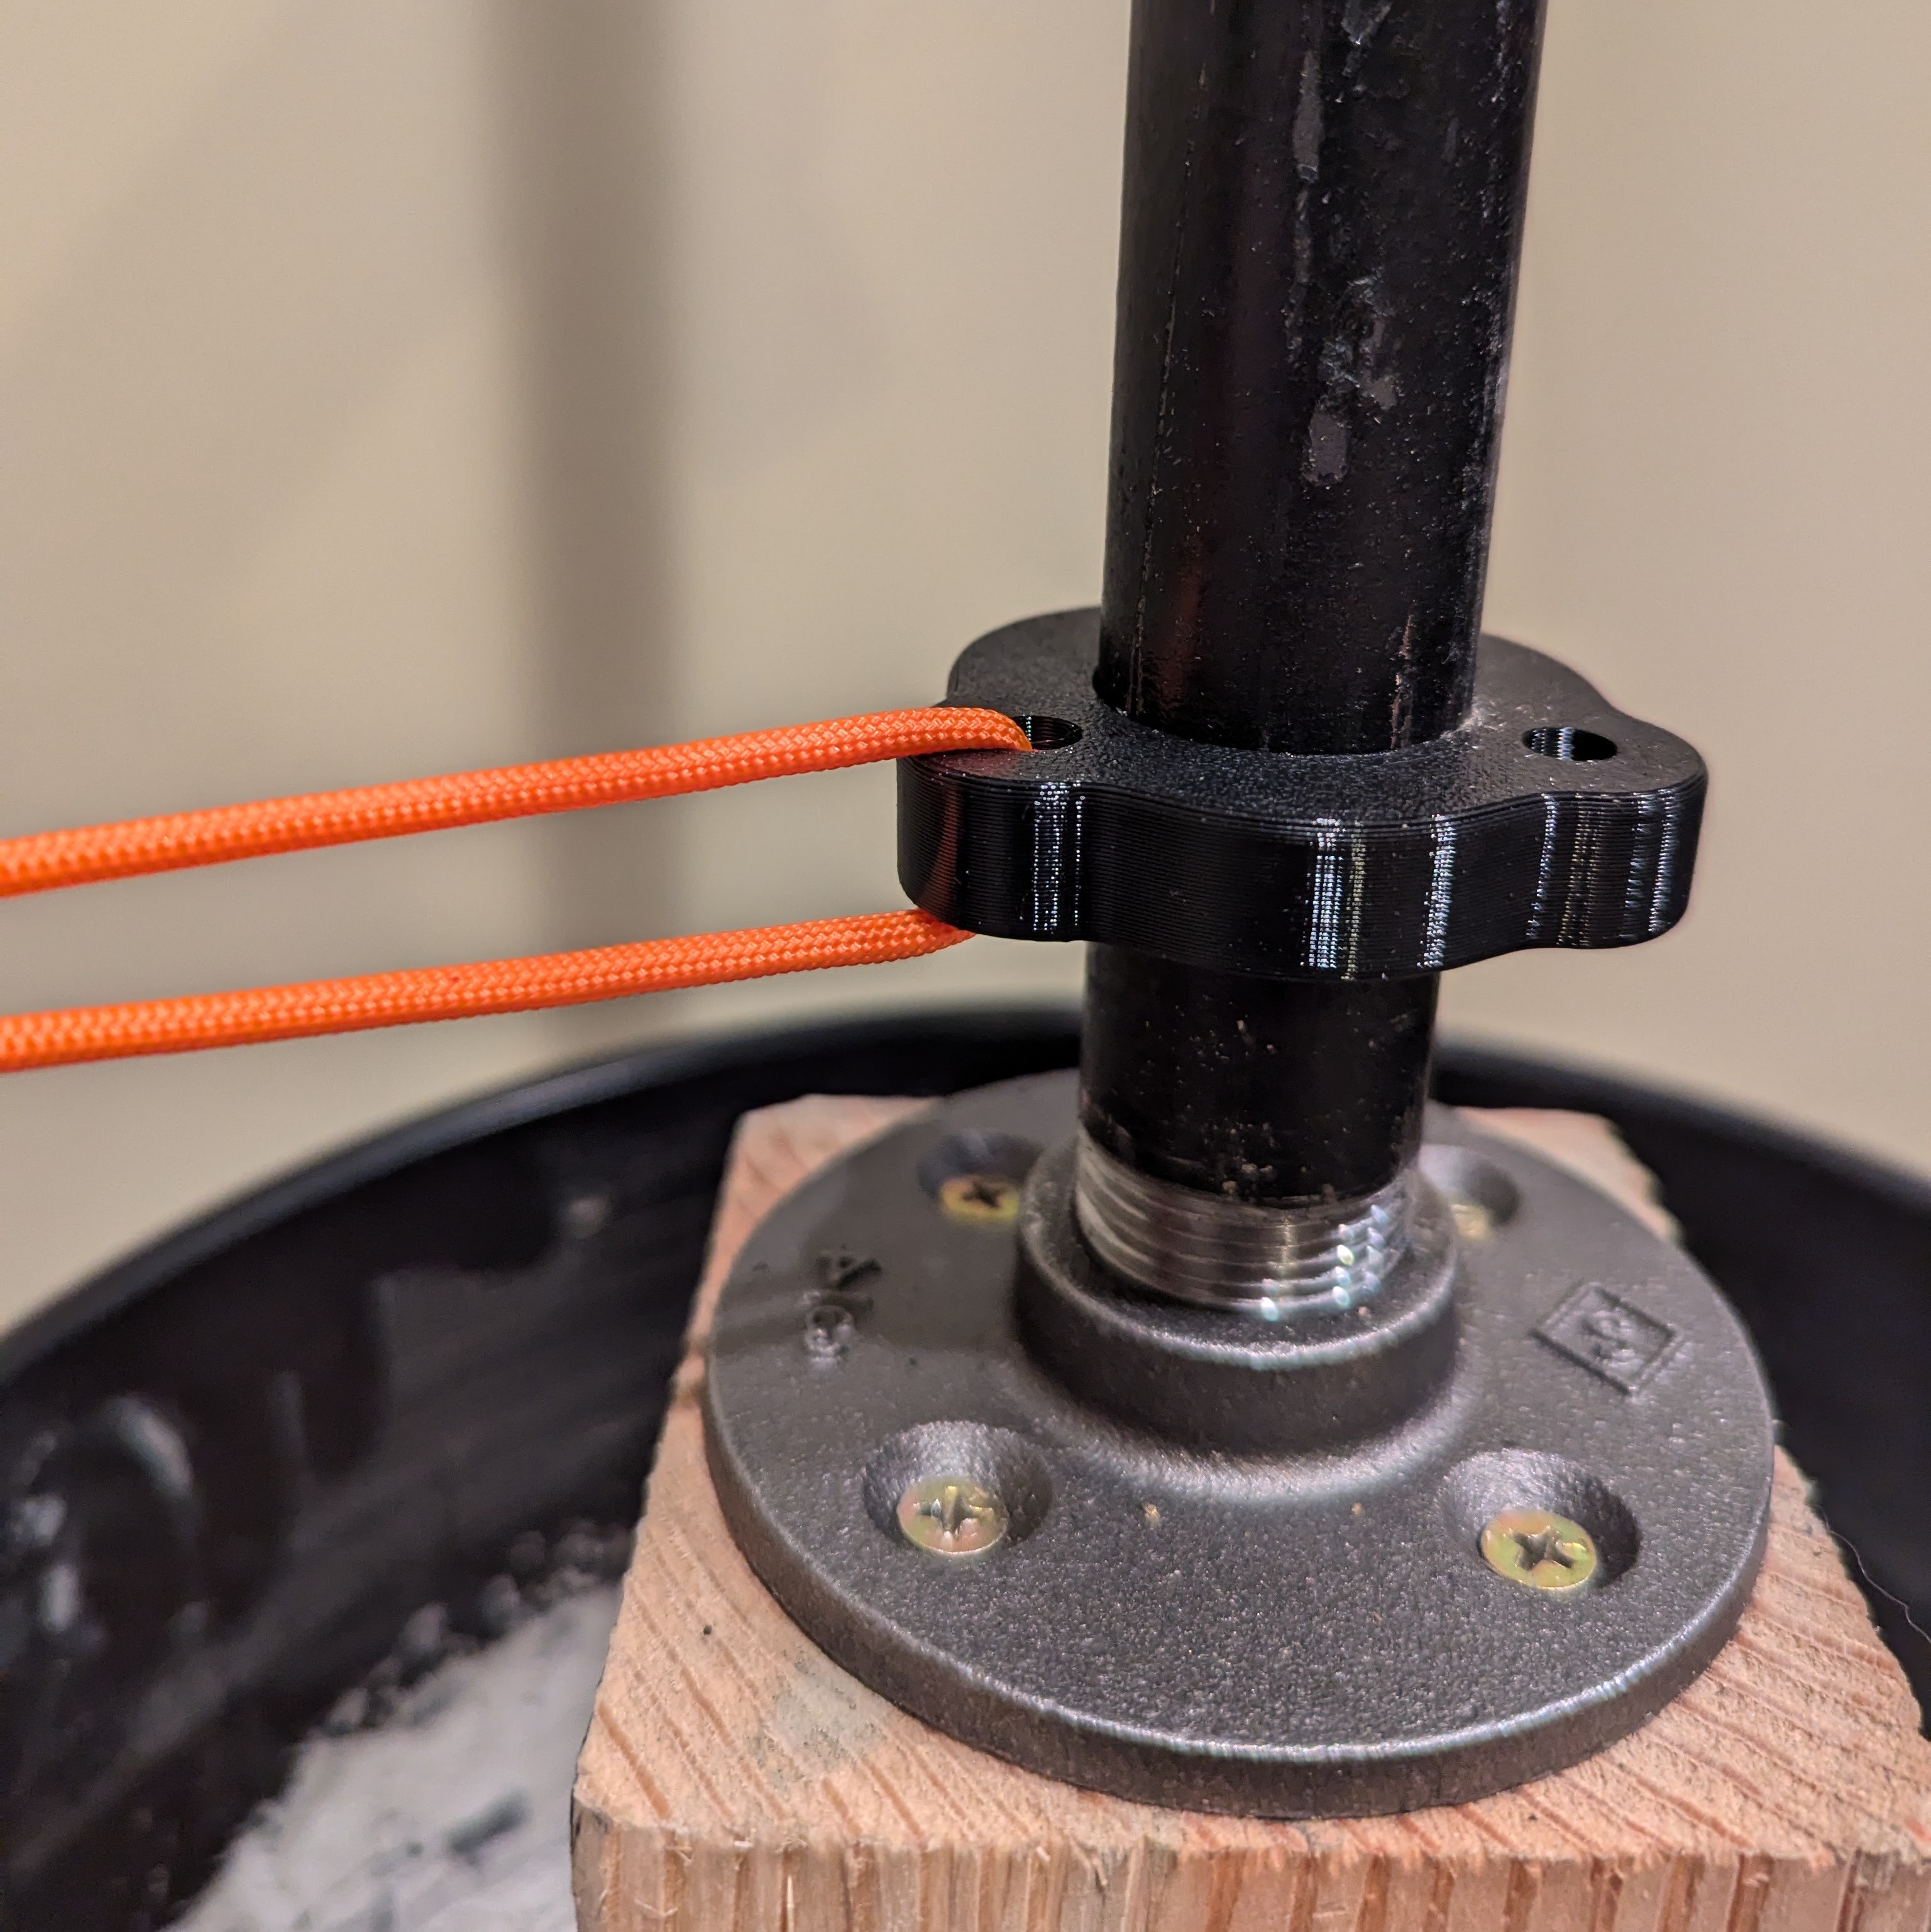
🧩 Step 7 – Slide Center Tieoff Ring onto ¾” Pipe
Slide the center tie off ring down the ¾” metal pipe. Position it at a height slightly above the flange & pipe threads. The lower the better! This will be the secondary attachment point for the ABS legs, providing resistance to the legs from bowing in/out.

Slide the tieoff ring down your ¾” metal pipe
🧩 Step 8 – Attach 3 ABS Legs onto Gusset
Slide the tripod gusset onto your ¾” metal pipe, above the tieoff ring you just slid on.
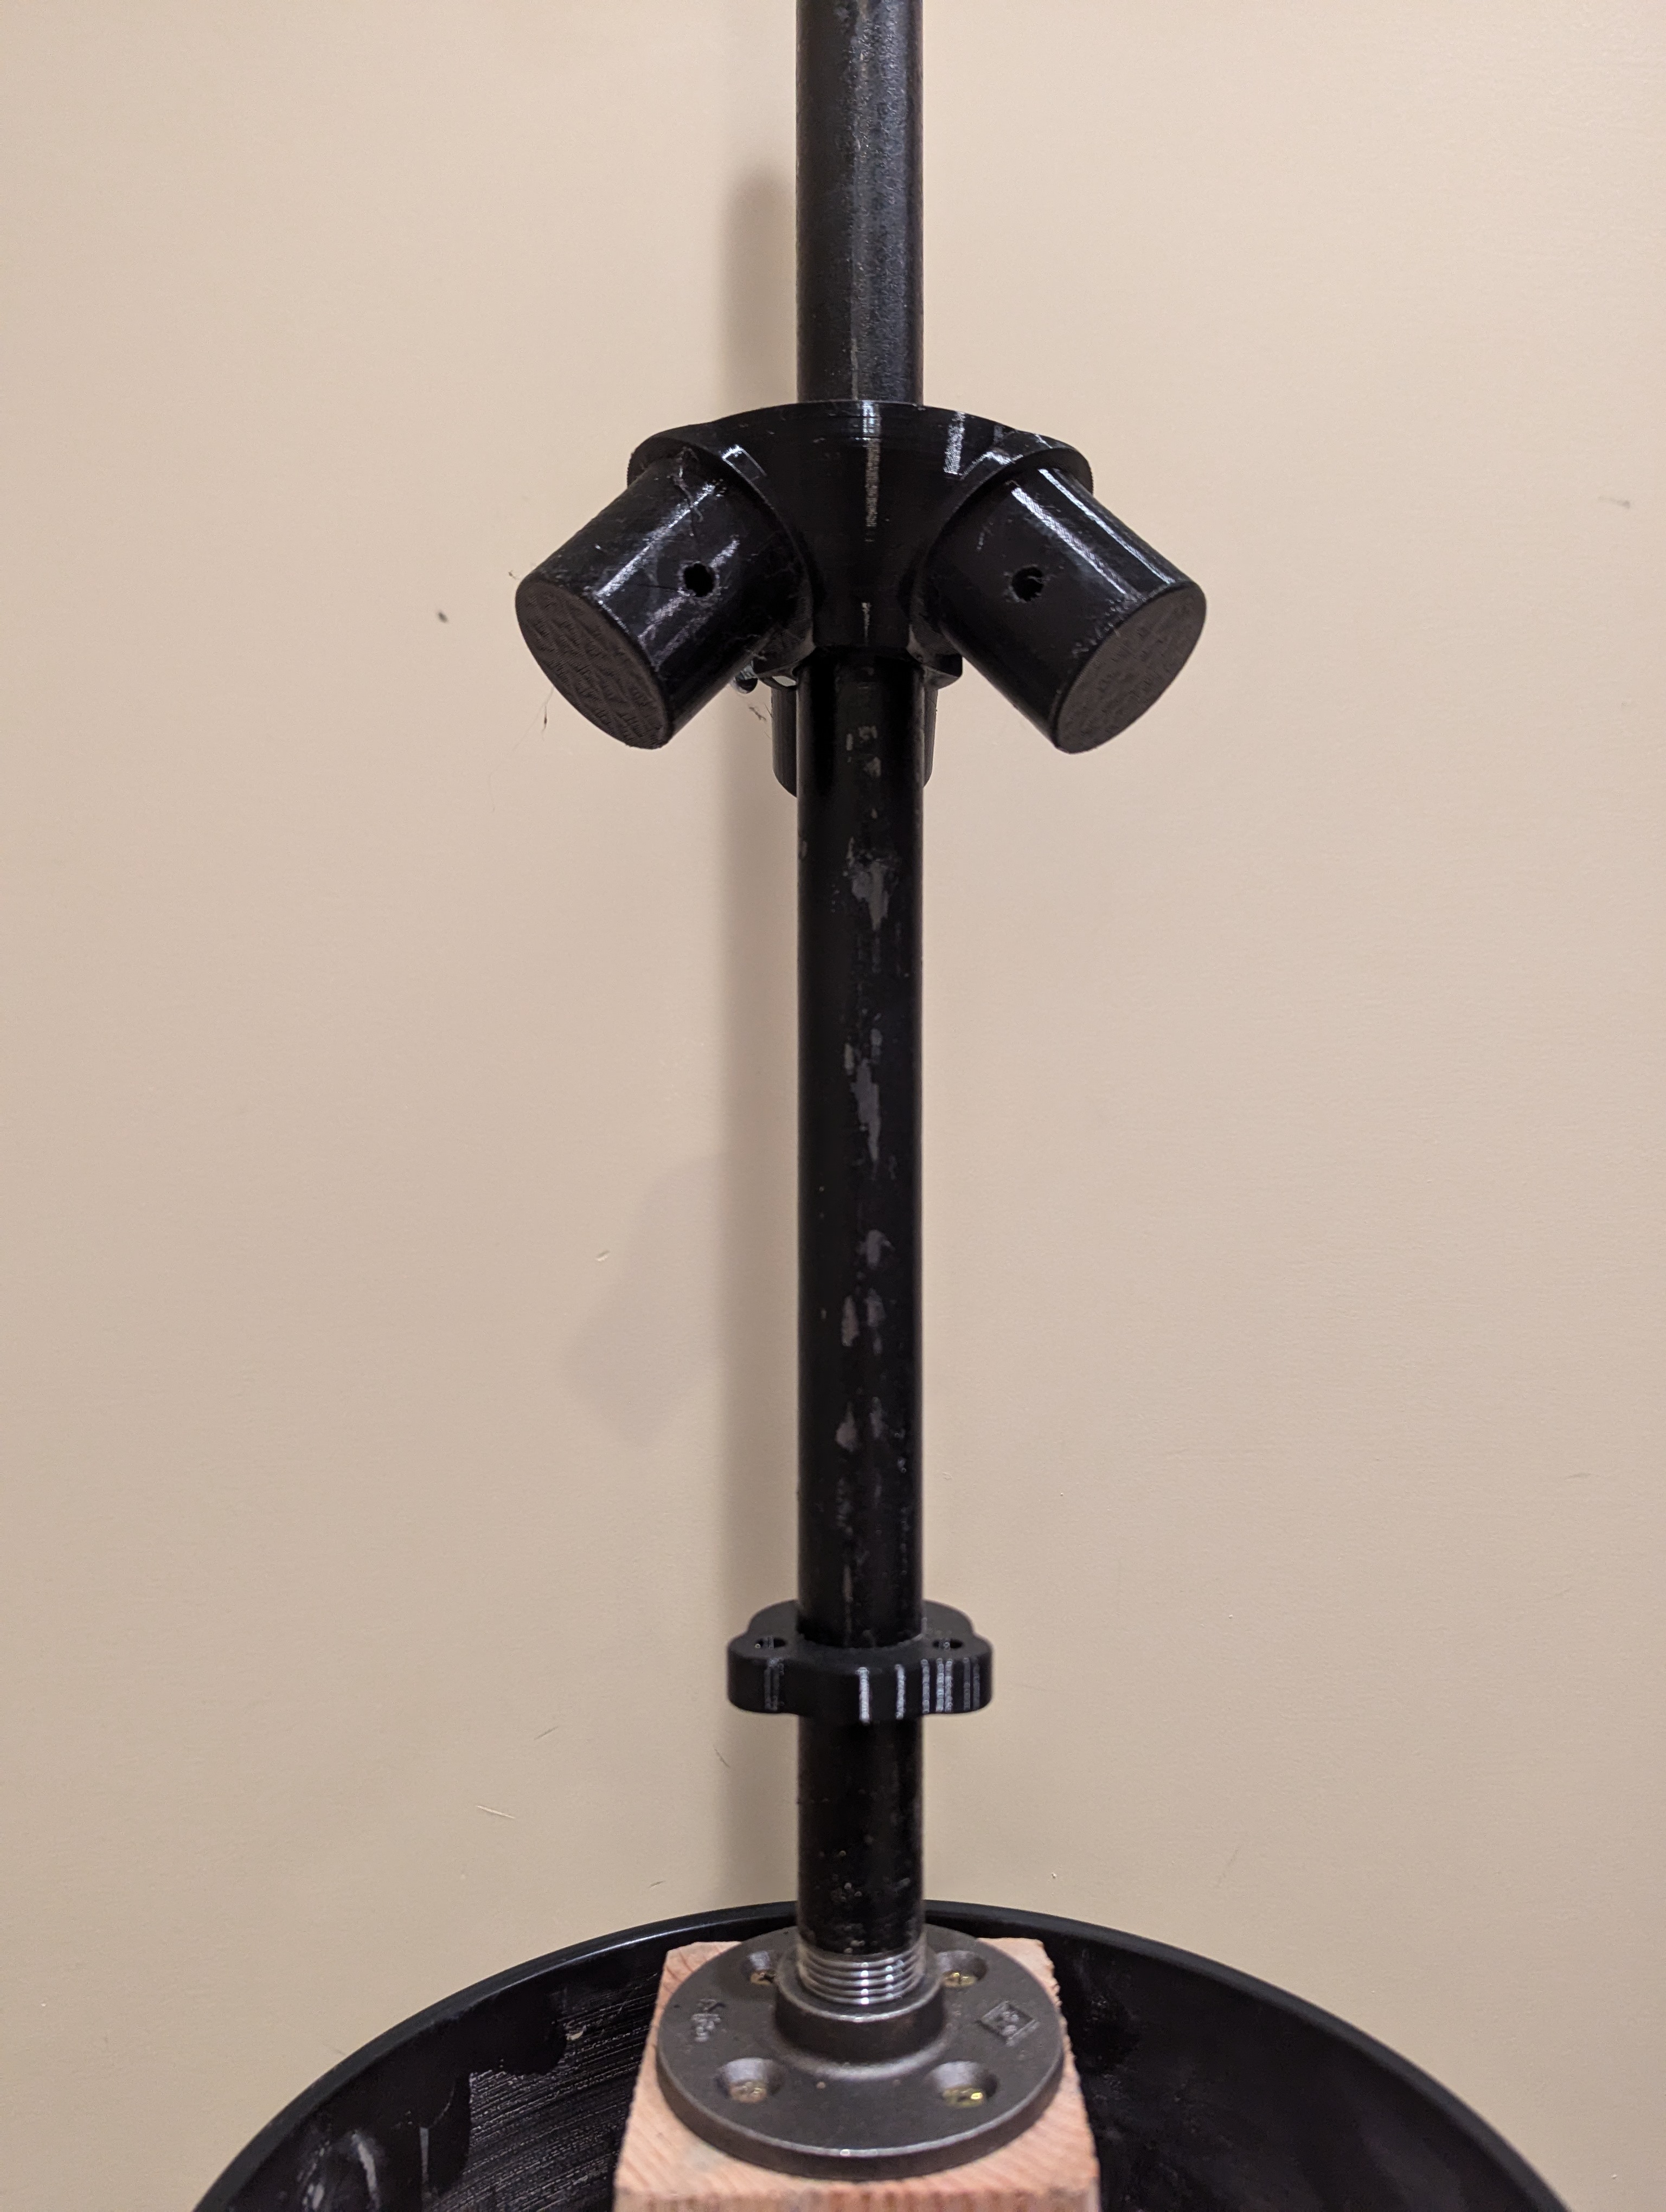
Slide the gusset on the pipe, above the tieoff ring
Now, utilizing the mounting holes you drilled previously, attach each of the ABS legs onto the center gusset. A 2” ¼-20 Machine Screw will fit through the holes on the pipe & on each of the spokes of the gusset. Once the screw is completely through the pipe & gusset, tighten a ¼-20 Nut onto the exposed threads.
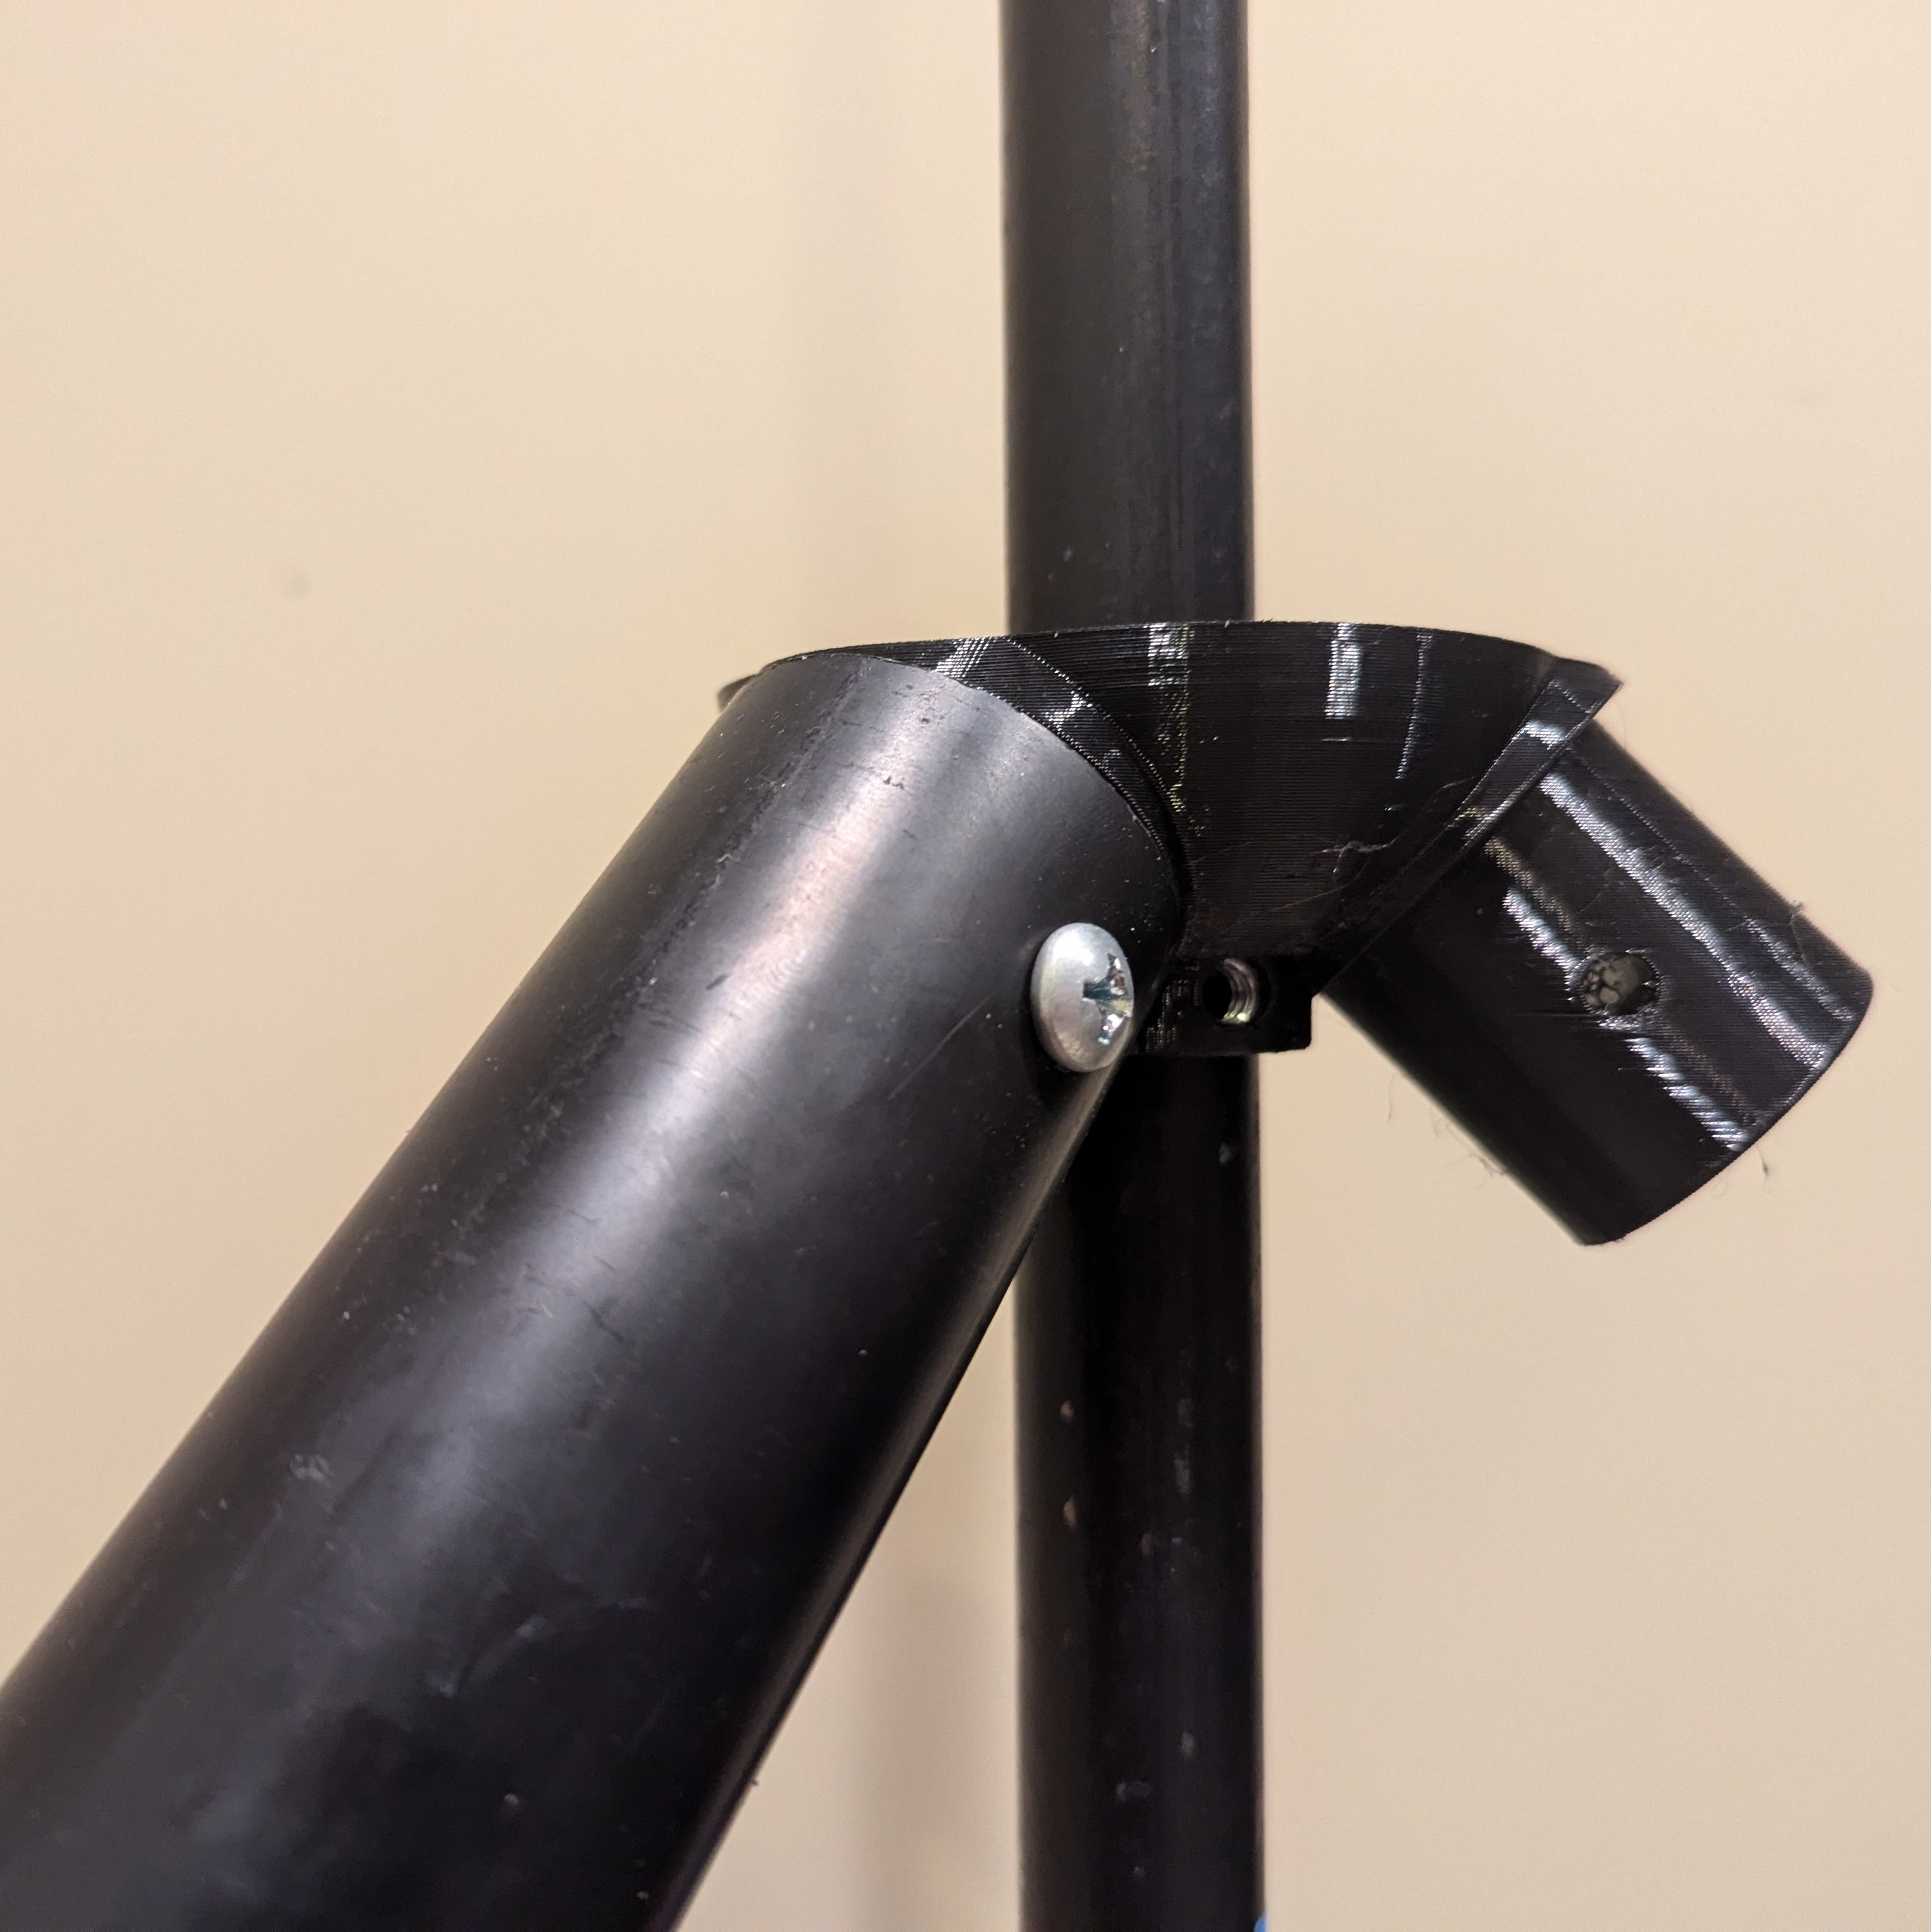
Fasten the pipe to the gusset with a 2" screw
Lock it in place with a nut on the other side of the pipe
Each attached leg should have both its rubber foot & leg tie off 3D prints attached to them at this point.
🧩 Step 9 – Fasten Leg Tieoff Hardware
Once the leg tieoffs are positioned on the ABS legs such that the tie-off point is level with the center ring, tighten the hardware. Tighten until the 3D part is firmly fixed to the pipe.

Adjust the tieoffs on the pipe so they are level with the center ring. Then tighten the screw until the tieoff is snugly on the pipe
If you are happy with placement and don't plan on changing the position of your leg tieoffs, consider drilling holes into the ABS pipe. This may make the position more repeatable upon reassembly. Note, you may want to purchase longer screws for a more rigid attachment.
🧩 Step 10 – Cut Paracord Down to Length
Cut the paracord down into 3 segments of equal length. The required length of these paracord segments may vary from setup to setup given that tie-offs may be at different positions. To determine your required length, roughly run the paracord through a leg tie-off & center tie-off, and simulate the knots in STEPS 11 & 12.
🧩 Step 11 - Tie Knot onto Leg Tieoff
To secure the paracord to the leg tie off, tie a knot in the paracord large enough to no longer fit through the hole. It is recommended that you make the knot double the size of the hole, given TPU’s flexible nature. Ensure the knot is tight.
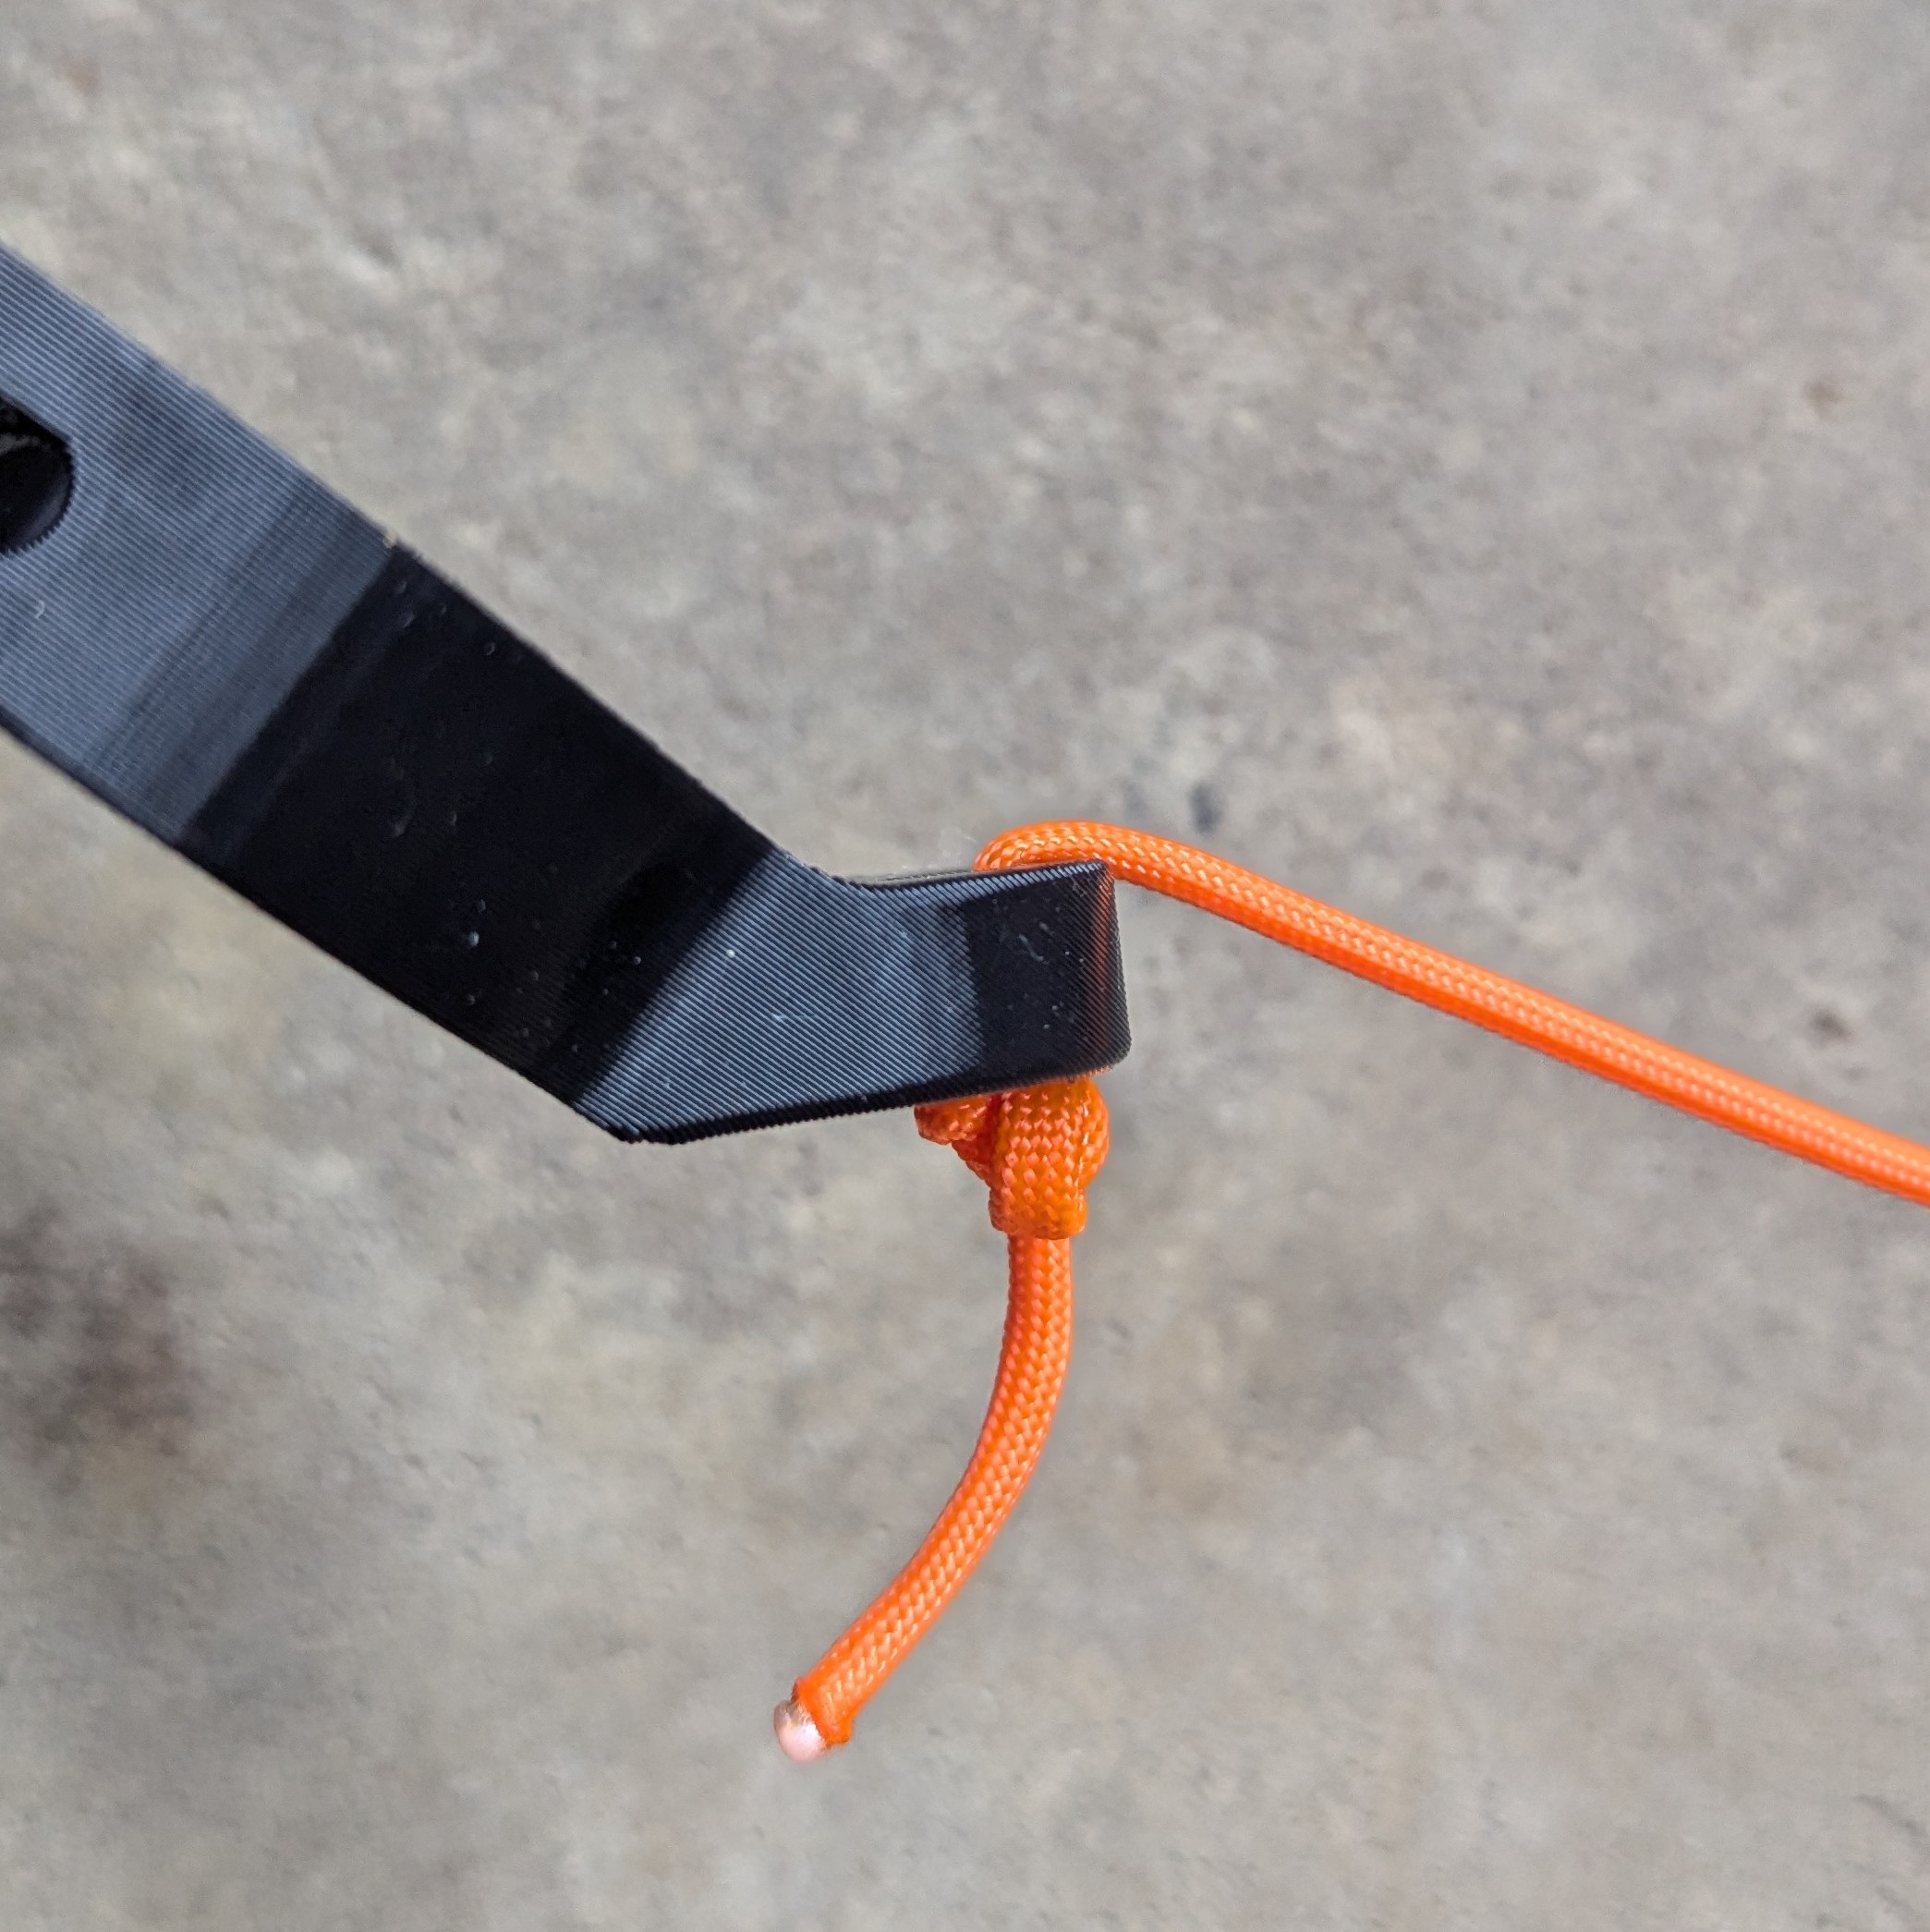
Tie the knot so that the cord can be secured through the tieoff
Make sure the knot does not slip through the hole
Once knotted, your progress should look something like this
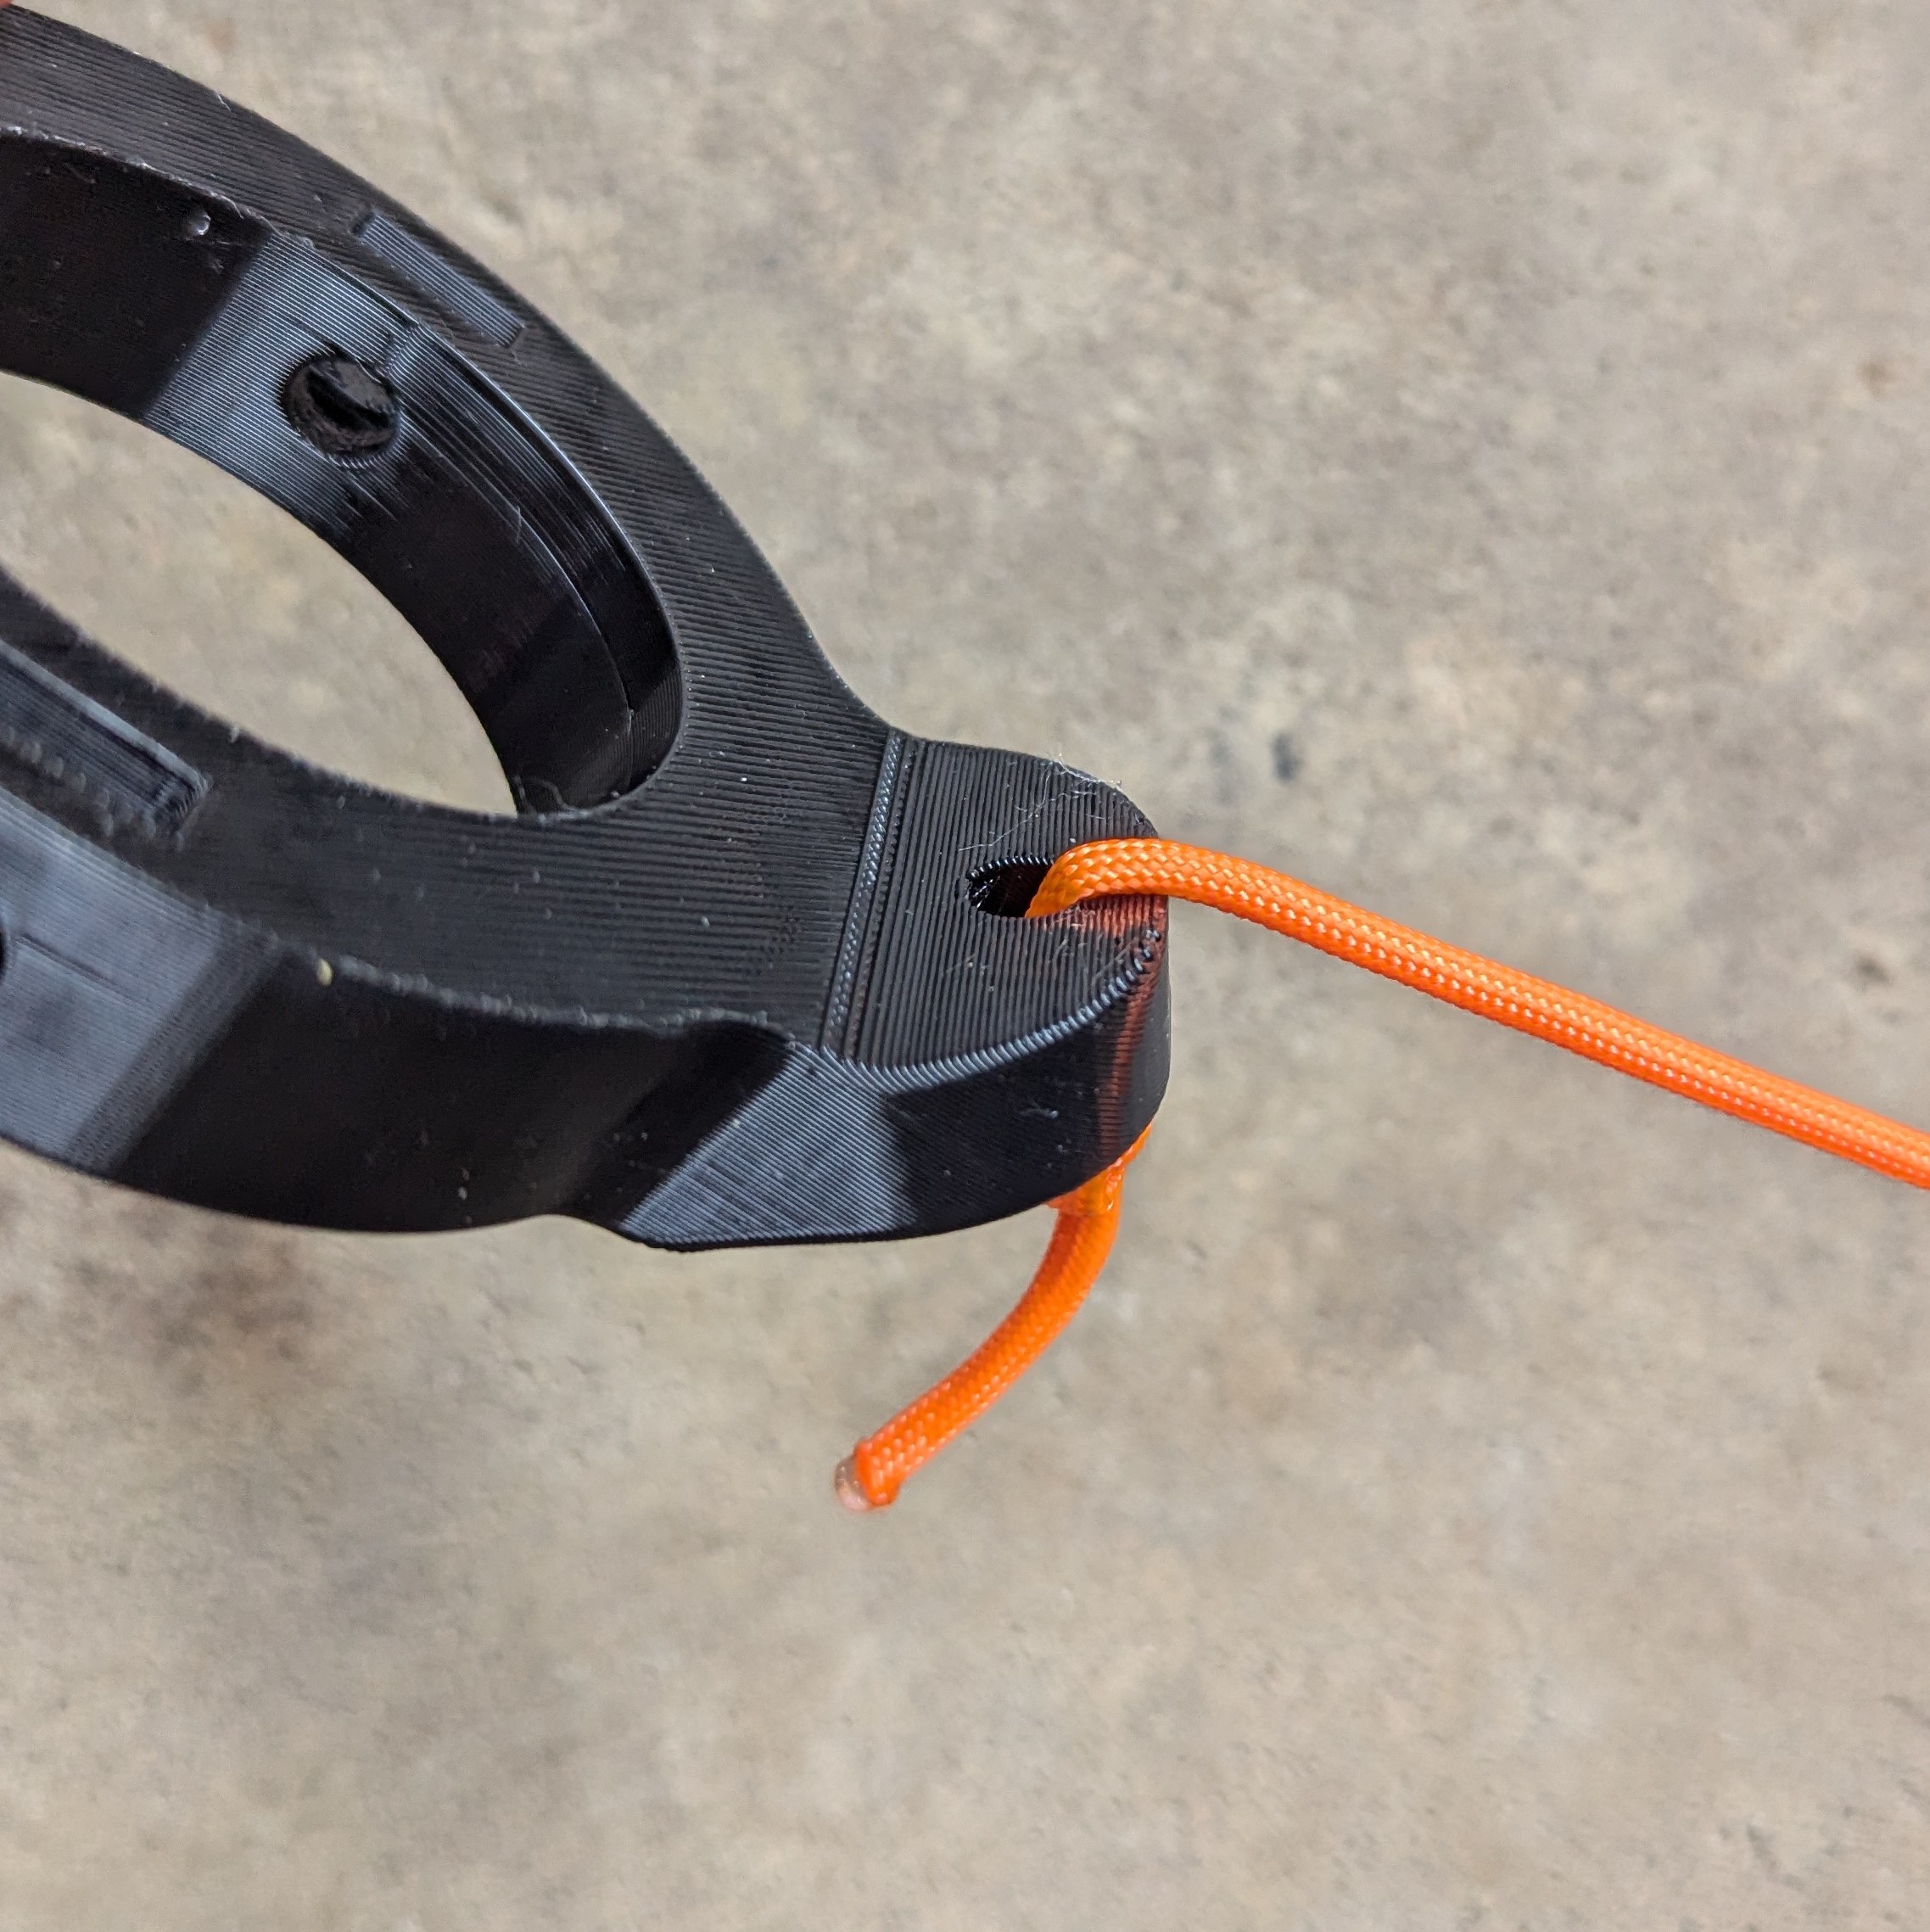
🧩 Step 12 – Tie Knot (Taut Line Hitch) around Center Tieoff Ring
Loop the end of the paracord without a knot through an open hole on the center tieoff ring. Then tie a taut line hitch. This allows the tension on the line to be controlled, making for a simpler disassembly & reassembly.
A simple video example showing how to tie a Taut Line Hitch

Your knot should look similar to this
Your paracord should loop through the tieoff ring like this
🔁 REPEAT STEPS 10-12 FOR THE OTHER TWO TIEOFFS
🧩 Step 13 – Add Hardware to Gusset
Insert a thin ¼-20 Nut into the slot of the center tripod gusset, you may need to hold it in place so it does not fall out due to gravity. Then thread in a 0.375” ¼-20 Machine Screw, through the hole, but do not tighten all the way.
Once the tripod assembly is positioned at the right height on the pipe, such that all legs are making complete contact with the floor. Then tighten the machine screw till the gusset is firmly locked in its position on the pipe.

This screw acts as a fastener to the ¾” metal pipe
🧩 Step 14 – Tighten Taut Line Hitches
Tighten the 3 paracord lines that tie all the legs back to the center pipe. This will ensure they provide the most stability possible
These lines may come loose throughout prolonged usage. Be sure to check their status throughout the day. Alternatively you could simply tie a tight line between attachment points for situations where rigidity is desired over portability.
✅ Final Check
You have completed the build for the tripod attachment. This stand attachment provides the utmost protection against falls, and gives a professional solution to mount your modules.
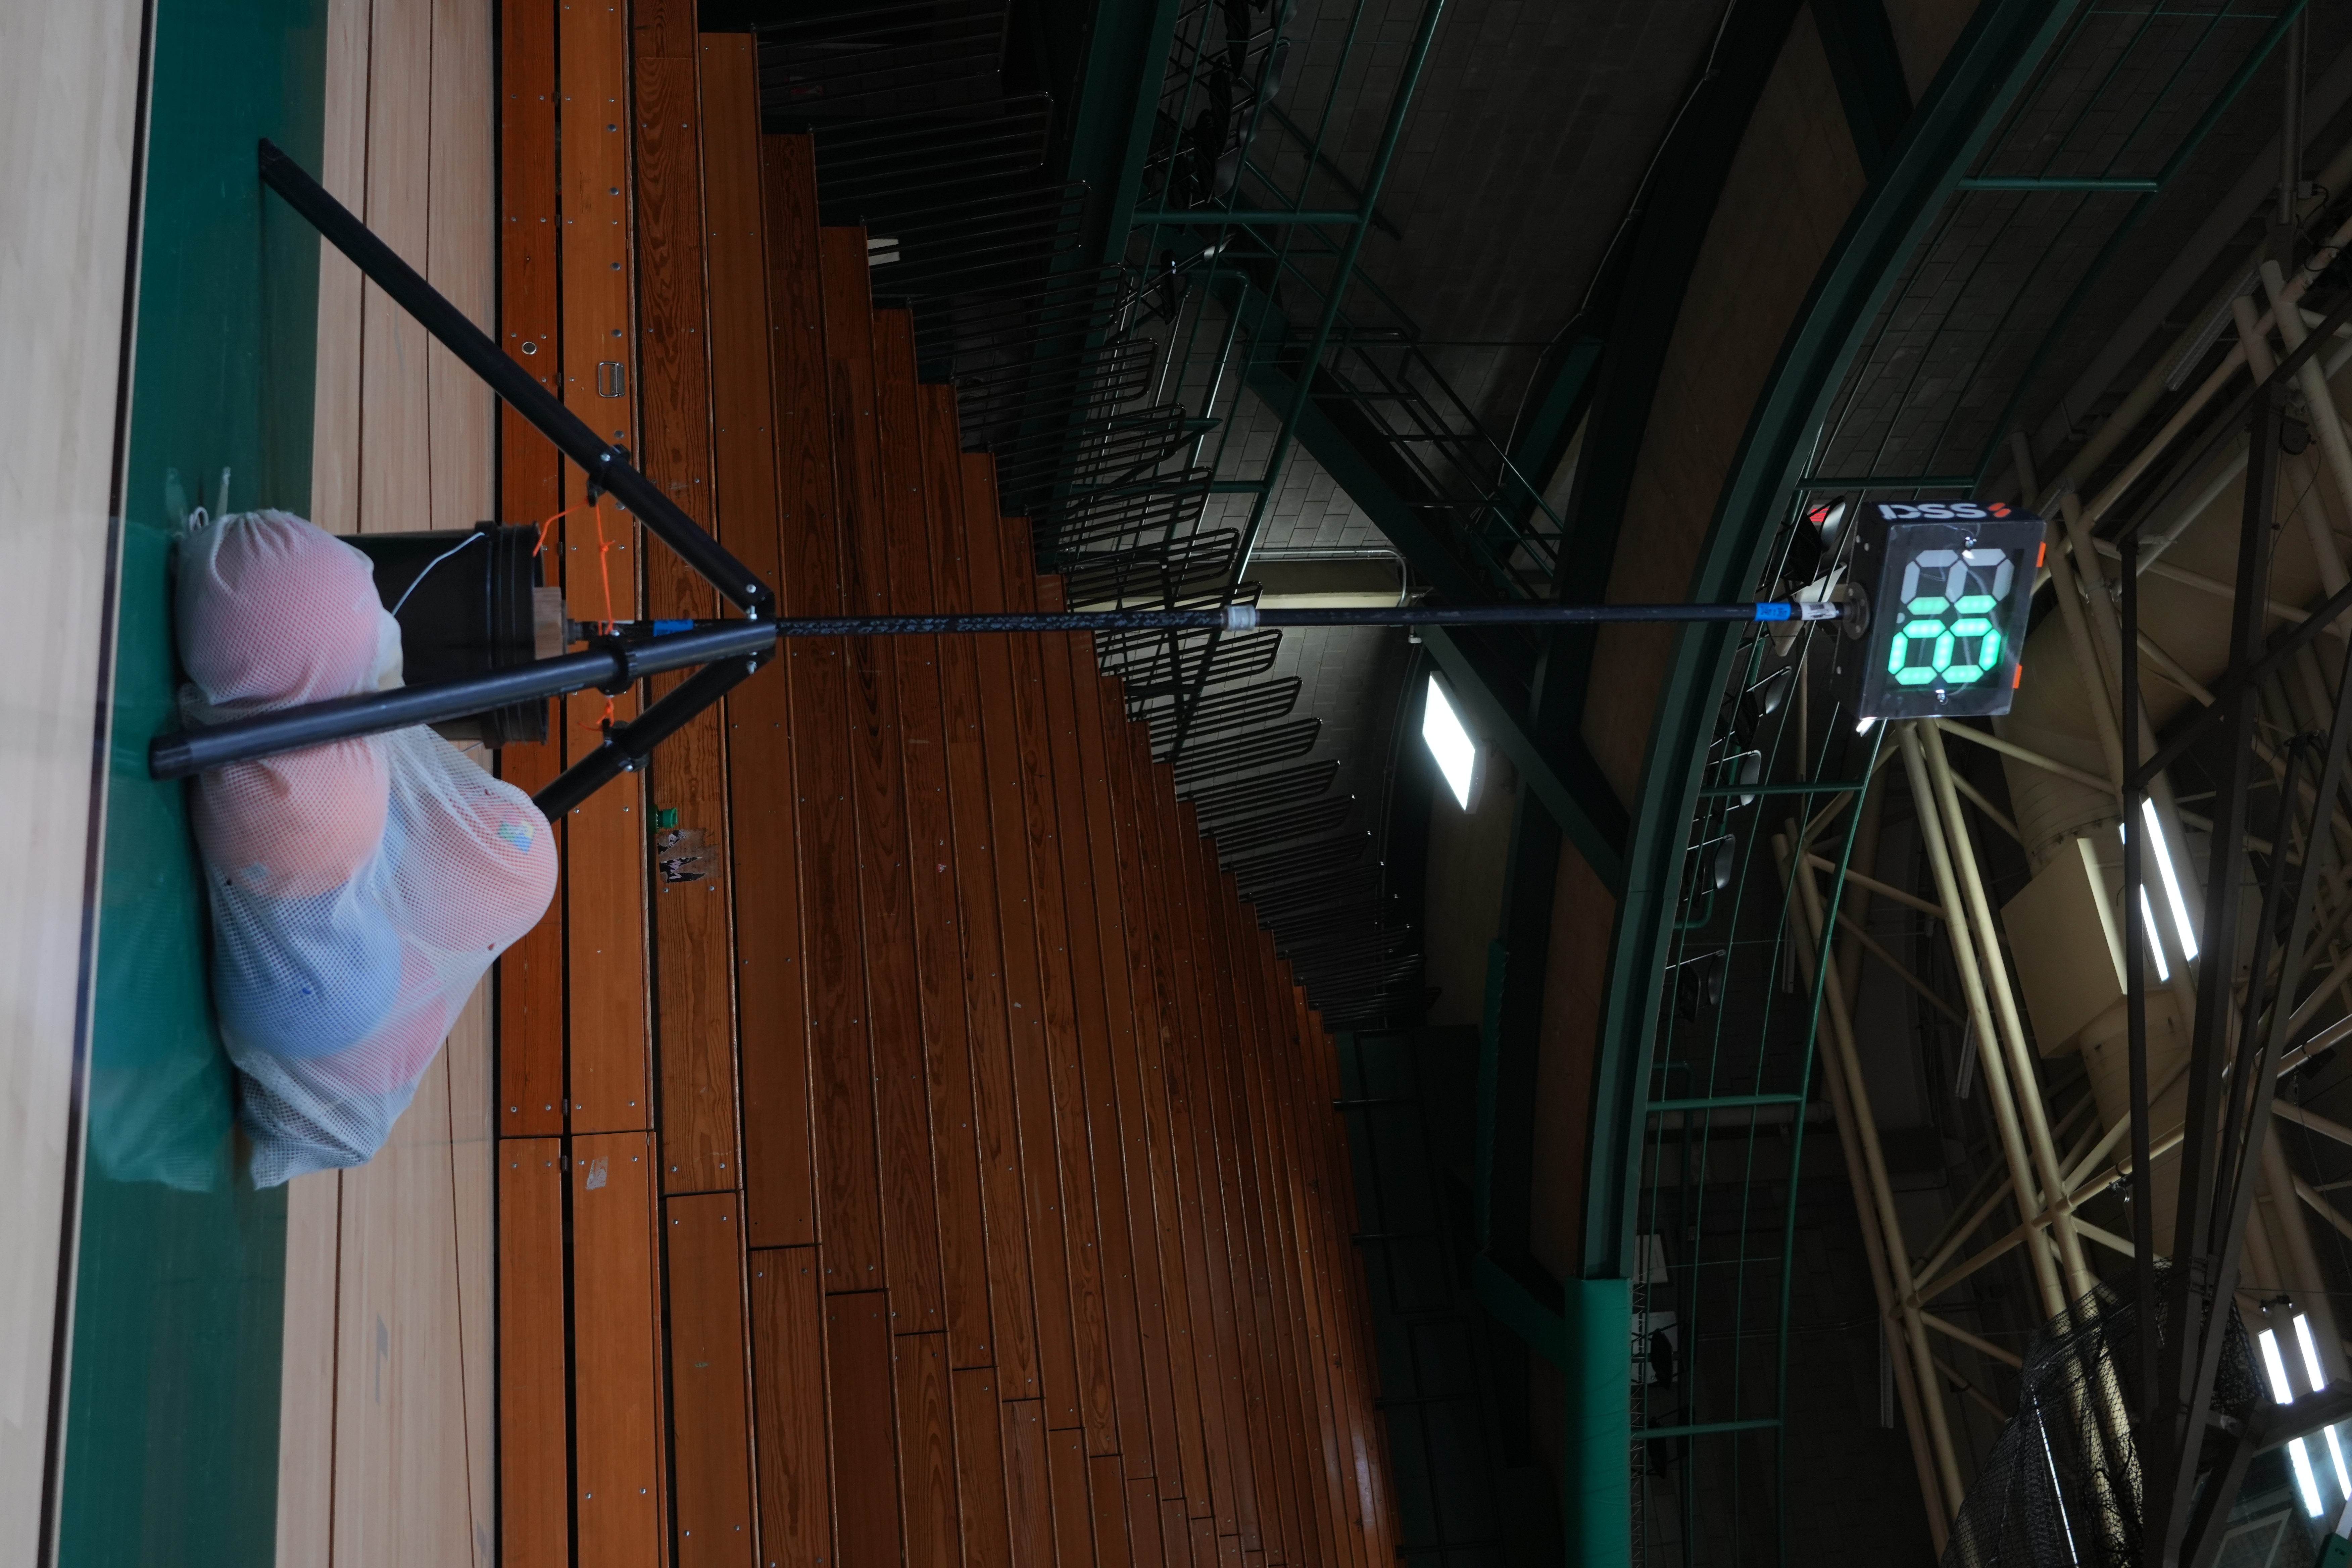
Tried and tested, perfect for big events
If you have decided to build the full reliable stand, PLEASE reach out to the DSS team on discord to share your results. We hope to help in any way we can.
Trying to get started with your Founders Edition module now?
👉 How to Set Up the Founders Edition
👉 How to Connect to the App